If something is written about your brand online, you want to know about it, right?
That’s even more true if it’s an authoritative source speaking about your brand and giving information to the public about what you sell, where you’re located, your hours, your website, and more.
When Google shares information about your brand in what is called Google Knowledge Panels, you don’t want to just know about it—you want to claim it.
Why do you want to claim knowledge panels? You get to control the narrative. When you tell Google you’re the owner of that brand, you can make sure the information is accurate and up to date.
This is a critical step when you’re using SEO to build your brand.
To claim knowledge panels for your brand is relatively simple and something you want to get on top of to keep customers coming through your doors or to your website with consistency, arming them with the right information.
What Are Google Knowledge Panels?
You don’t have to use too much imagination. Remember the last time you googled anything? The information you were looking for just popped up, towards the top of the screen, with relevant data all in one place.
Enter Google Knowledge Panels. You don’t have to know what they’re called to know what they are. They are the boxes of information you see near the top of a Google search for anything from a person to a brand.
Knowledge panels can include:
- a brand or entity name
- descriptions
- details about the person or brand
- history
- contact information
- featured images
According to Google, it uses different factors to decide what goes in that panel. As you start to look around, you’ll start to notice some information seems gathered from other sources, such as Wikipedia or other online websites.
In addition, Google uses its data involving keyword searches and questions people tend to ask regarding that particular entity or item, and it pulls those questions and answers in.
It’s all based on Google’s Knowledge Graph. Google uses all that data to build the knowledge panels you see when you search for something. These aren’t necessarily generated by the person who has claimed their Google knowledge panel.
Now, let’s look at a couple of examples.

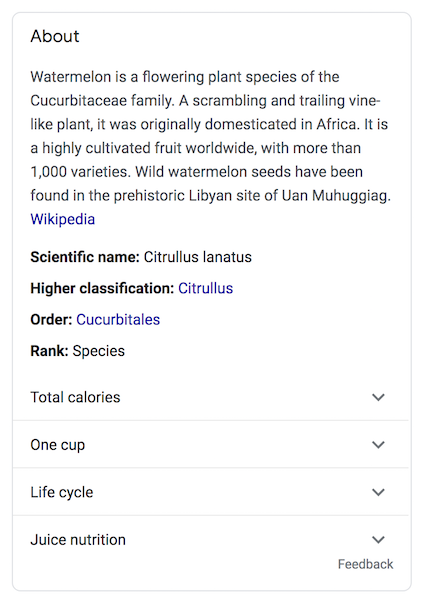
This one is about watermelons. It’s not specifically owned by anyone in particular and therefore not claimable.

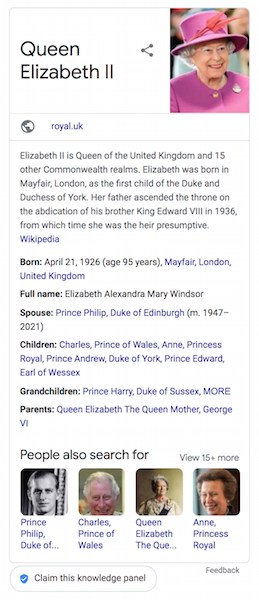
Here is an example of a knowledge panel associated with a person. She could go in and claim it using the button on the bottom left.
We’ll discuss more about how this works.
Why Should You Claim Knowledge Panels in Google?
Is it worth taking the time to claim knowledge panels in Google? If you’re the owner of a brand with a knowledge panel, you can verify your relationship to that entity and at least influence some of the information provided in the panel.
There are several reasons why you should consider taking the time to claim knowledge panels:
- increase control over what’s being highlighted about your brand
- ensure accurate and up-to-date information
- keep social media profile links up to date
- choose which featured images are used
- have a more engaged relationship with what Google is showing about your brand
While you don’t have direct access to the panel to make changes, by claiming your knowledge panel, you have Google’s ear, so to speak. You can send in a suggestion or request an update with your Google account associated with that knowledge panel so when Google receives your request, it knows it’s coming from an authoritative source.
Steps to Claim Knowledge Panels in Google
ow you’re ready to claim knowledge panels that relate to you, your brand, or entities that you represent in Google. Here are some steps to get you started:
1. Sign in to Your Google Account
You need to have a Google account to be able to claim knowledge panels. If you have a Gmail address or other Google product where you’ve set up an account, then you are good to go. If not, go ahead and set one up. To continue, you’ll need to be logged in.
Now log in to your preferred Google account. If you use a specific account for your brand or your related business needs, sign in to that one.
2. Search for the Knowledge Panel Topic
Once you’re logged in, use Google to search for yourself, your brand, your entity, or your organization. It may seem self-explanatory, but you need to actually type in the entity for which knowledge panel you’re looking for.
The goal here is to pull up the knowledge panel like any other searcher on the internet would see it. There is no back-end way to see the knowledge panel, like the development or content end of your website.
The nice thing about this is you’ll be able to see what users see. Maybe since you’re sitting down to work on this anyway, you may think of related topics you want to check out. You can do that from here by performing a search for that knowledge panel.
Now that you’ve searched for it, you should see the brand or other name at the top of the knowledge panel. If not, search again. Many brands or organizations have similar or even identical names, so make sure you see yours before continuing. You don’t want to accidentally claim someone else’s—or get stuck not being able to claim your own.
3. Click the Claim Knowledge Panels Link
Look for the link on the bottom that says, “Claim This Knowledge Panel.”
The button is located at the bottom of the box surrounding the knowledge panel. The size may vary, but all are surrounded by a thin line.
Go ahead and click the link. If you don’t see it, the knowledge panel may already be claimed by another entity. Make sure you’re looking at the right panel.
Here you will be able to review the available features. As we mentioned above, knowledge panels are not created by those who claim or verify them. Google uses various algorithms and machine knowledge to pull what it deems to be relevant information into these panels.
4. Look for Profiles You Can Use to Claim Knowledge Panels
Google uses a number of different connections on other web platforms that you can sign into to prove your identity or relation to the knowledge panel you want to claim. You can choose from YouTube, Facebook, Twitter, and more. Once you sign in to one of these, you’ve claimed your knowledge panel and can make updates or changes as available.
5. Give Others Access
Once you’ve gone through all the work to claim your knowledge panel, you may want to make sure other people on your team have access to your brand’s knowledge panels as well.
To do this, you need to be logged in to the same Google account you used to claim the panel. Go to Google’s Manage User page.
Click to add people and then add the email addresses of those you want to give access to your knowledge panels. Choose which levels of permission you want to give them. Every level has the option to go in and suggest changes to your knowledge panel, which we will discuss in more detail below. However, an owner or manager can add or delete others from access.
7 Steps to Update Your Google Knowledge Panel
Now that you have verified yourself and have claimed your knowledge panel, you can begin the work of actually managing it.
This won’t eat up all your time or require constant maintenance, but you may want to check in every once in a while. If you do see an error in your Google knowledge panel or if one has been reported to you, you can take certain steps to make necessary updates. It’s at Google’s discretion, however, so it may take some time and patience.
- Sign In
Make sure you’re logged in to the Google account you used to claim your knowledge panel, or the one someone used to gain you access to the knowledge panel. Otherwise, Google won’t recognize you as someone related to that account.
In addition, you need to turn on “Web and App Activities” under Google’s Activity Controls in your Google account. Essentially, this helps track your steps as you are moving around your searches and helps Google ensure you have access to the knowledge panel.
- Search for the Knowledge Panel
Just as when you claimed your knowledge panel, you need to use Google Search to look for the entity whose knowledge panel you want to update. Googling your brand’s name is probably the best and easiest way to get there, but remember to look carefully at the knowledge panel and make sure it’s referencing the entity you intended. If not, keep searching until you find the right one.
- Click Suggest Edits
If you are logged in to the correct Google account and are looking at the associated knowledge panel, you should see a link at the top of the knowledge panel that says “Suggest Edits” or a similar iteration. If you don’t see it, verify you are signed in correctly and are looking at the right knowledge panel.
When you are, go ahead and click it. This is your portal for suggesting updates.
- Choose What You Want to Update
Click the area you want to update. You will be doing each one separately, so if you have more than one change you would like to see, just start with one, and you can continue with more changes later.
Areas you want to update might include images, descriptions or titles, social media profile links, and more.
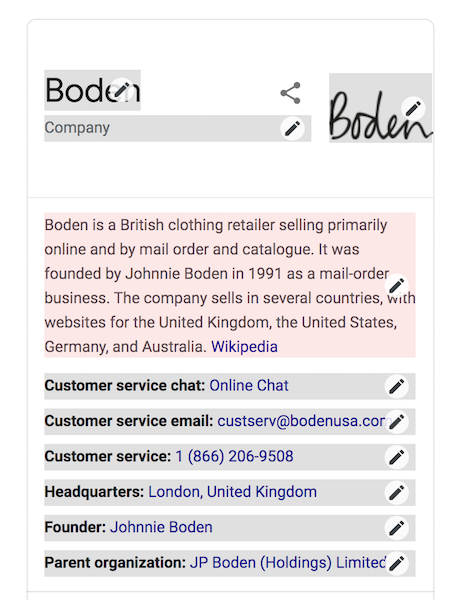
Here is an example using Boden’s knowledge panel. You can see how each bit of information is broken into different options. You can choose which section you want to suggest an update for.

- Write Out Your Suggested Updates
Because this is Google’s product and not one you can directly control yourself, you can’t just go in and make updates on the areas you would like.
You can, however, ask Google to go in and review your suggestions.
When you click on the area you want to update, a small text box will open where you can enter your suggested update.
Be as specific as possible and provide as much background as you can. This helps the reviewer on Google’s end have as much context as possible to understand the logic behind the suggested change. You can also provide links to any websites or pages to verify your requested change.
- Wait
This isn’t the easy part, but you will have to wait for your review to be accepted. Google will manually review your suggestion and check for verifiable information online to back up your update for accuracy. That’s why providing the specifics and URLs as mentioned above is important.
When Google accepts your updates, you will be contacted via email.
- Create More Suggestions
You should send each update as a separate request. In other words, if you want to see the image updated as well as social media profile links, you should do these separately.
This keeps the review process clean and easy to follow. It also allows you to be specific and detailed without muddling your requests.
Get in there and make suggestions for updates whenever you deem necessary.
Conclusion
Knowing what people are learning about you and your brand is key to understanding how the public perceives you. If the information at the top of a Google search isn’t accurate or isn’t reflective of what you want to project, you need to claim knowledge panels and request those updates are made.
Claiming knowledge panels can give you at least a little more control over how your brand appears in a Google search, but it’s not the end. In fact, it’s just one step in building an online brand and SEO. There’s so much you can do to improve your SEO and stay in front of your customer base with the knowledge they need to interact with your brand well.
Have you claimed your brand’s Google knowledge panel yet?


