𝗦𝘁𝗮𝗿𝘁 𝗵𝗲𝗿𝗲 ➜ https://websitelearners.com/get/make-free-website
𝗚𝗲𝘁 𝘁𝗵𝗲 𝗗𝗼𝗺𝗮𝗶𝗻 ➜ https://websitelearners.com/get/freewebdomain
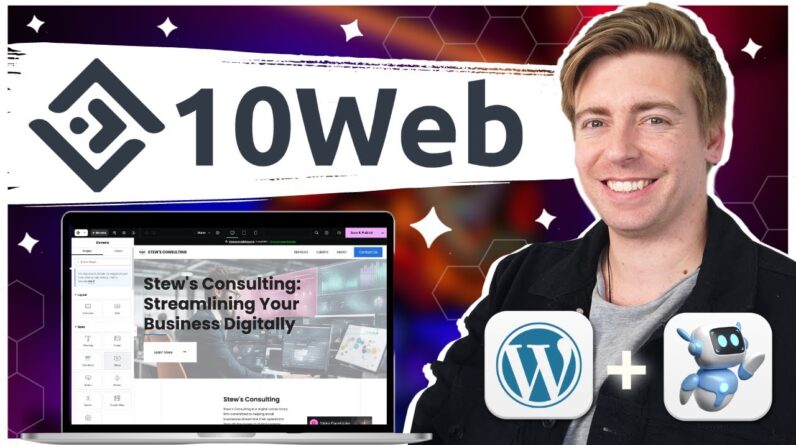
𝗖𝗵𝗲𝗰𝗸𝗼𝘂𝘁 𝗼𝘂𝗿 𝗲𝘅𝗰𝗹𝘂𝘀𝗶𝘃𝗲 𝗪𝗼𝗿𝗱𝗣𝗿𝗲𝘀𝘀 𝗰𝗼𝘂𝗿𝘀𝗲 ➜ https://link.websitelearners.com/Wordpress-course
𝗛𝗼𝘄 𝘁𝗼 𝗠𝗮𝗸𝗲 𝗠𝗼𝗻𝗲𝘆 𝘄𝗶𝘁𝗵 𝘆𝗼𝘂𝗿 𝘄𝗲𝗯𝘀𝗶𝘁𝗲 ➜ https://websitelearners.com/ebook/top-5-ways-to-monetize-your-website/
𝗩𝗼𝘁𝗲 𝗳𝗼𝗿 𝗼𝘂𝗿 𝗻𝗲𝘅𝘁 𝘃𝗶𝗱𝗲𝗼 ➜ https://topics.websitelearners.com/websitelearners
𝗣𝗼𝘀𝘁 𝗜𝘀𝘀𝘂𝗲𝘀 𝗛𝗲𝗿𝗲 ➜ https://wltalk.com/post/1737297482
Learn to make your own Website for free with free domain name and free hosting.
𝗧𝗮𝗯𝗹𝗲 𝗼𝗳 𝗰𝗼𝗻𝘁𝗲𝗻𝘁𝘀 :
00:00 Intro
00:39 Part-1 launch your website
04:25 Part-2 Start building your website
11:02 How you can add a new page to your website
14:05 How you can get a .com domain name
We’re going to create our website in just 2 parts.
So Let’s get started!
The first part is to ‘Launch your website’
Once, you launch your website, your website will be live on the internet
So to Launch your website,
We’re going to do 3 steps
The first step is to ‘create an account in profreehost’
This is the website which is going to help us create our website for free.
So to create the account, go to profreehost.com
once you’ve created the account,
We can go to step 2 which is to ‘get your free domain’.
A Domain is the name of your website .
Now enter the name you want for your website
Once you’ve got your domain.
We can now go to step 3, which is to ‘Install WordPress on your domain.’
Once we successfully installed WordPress, our website is now live on the internet.
So now we have successfully launched our website for free.
We can now go to the next part which is to ‘start building your website.’
Your website will have a default WordPress Theme. To change the default theme,
We are going to do 4 steps.
The first step is to ‘Login to your website’
So once you’ve logged in,
We can now go to step 2, which is to ‘choose a design for your website’
So to choose your website design, you need to install a theme called ‘Astra’ in WordPress
Once you’ve installed the theme,
we can go to the next step which is to choose your design.
Now click on ‘Elementor’ to choose your design.
And here you will find different website designs which you can apply to your site.
So, choose the design and import it to your site.
Now how do you change the content of these pages?
So let’s go to step 3 which is to ‘edit the contents of your website
So, To edit any page of your site, just go into page
and click Edit with Elementor.
You’ll then go to an editing section. Now, to edit any text or image, just select it,
and change anything you want. This process works throughout the website.
Now, if you want to edit the header and the footer area of your website,
Just click ‘Customize’ to edit the logo or menu section.
Now what if you want to add a new page to your website?
To create a new page, you can use 2 methods:
1) Create your OWN page by dragging and dropping elements using Elementor.
2) Use pre-made designs using Templates.
So now we have successfully created our website for free.
Now as we see our domain has the extra text, after the site name which we selected.
Instead of this, if you want to get a domain like ‘Yoursite.com’, you can get it by purchasing a .com domain
To get a domain name with ‘.com’
Just click this link ➜ https://websitelearners.com/get/freewebdomain
And it will take you to godaddy.com
search for the domain name you selected, add it to cart and purchase it.
So now we have successfully got our domain.
So now how do we move the website we built to this domain?
To do that We’re going to do 3 steps
First step is to ‘add your domain to profreehost’
Now enter your domain name in parked domain section
Once you’ve entered the domain
Let’s go to step 2 which is to ‘add DNS records to godaddy’
you need to add the 2 records from profreehost to Godaddy
Once you’ve added these records, your new domain will be added to profreehost.
So once you’ve added your domain
We can go to the final step,
Which is to add your domain name to WordPress
Now to go ‘settings’ in WordPress,
And replace the domain which you purchased with the free domain.
So this is how we got the website which we built on this new (.com) domain.
So that’s it guys.
——————
📢 𝗧𝗵𝗲 𝗧𝗼𝗼𝗹𝘀 𝘄𝗲 𝘂𝘀𝗲:
𝗚𝗲𝘁 𝗘𝗹𝗲𝗺𝗲𝗻𝘁𝗼𝗿 𝗣𝗿𝗼 ➜ https://websitelearners.com/get/elementortool
𝗚𝗲𝘁 𝗔𝘀𝘁𝗿𝗮 𝗣𝗿𝗲𝗺𝗶𝘂𝗺 ➜ https://websitelearners.com/get/astratools
𝗚𝗲𝘁 𝘁𝗵𝗲 𝗯𝗲𝘀𝘁 𝘁𝗼𝗼𝗹𝘀 𝗳𝗼𝗿 𝘆𝗼𝘂𝗿 𝘄𝗲𝗯𝘀𝗶𝘁𝗲 ➜ https://websitelearners.com/tools/
𝗩𝗶𝗱𝗲𝗼 𝗚𝗲𝗮𝗿 𝗪𝗲 𝗨𝘀𝗲 ➜ https://kit.co/websitelearners/video-…
𝗢𝘂𝗿 𝗩𝗶𝗱𝗲𝗼 𝗘𝗱𝗶𝘁𝗶𝗻𝗴 𝗧𝗼𝗼𝗹 ➜ https://bit.ly/2Od546p
🙌 𝗢𝗳𝗳𝗶𝗰𝗶𝗮𝗹𝗹𝘆:
𝗪𝗲❜𝗿𝗲 𝗛𝗶𝗿𝗶𝗻𝗴: https://websitelearners.com/careers/
Want your website developed by us? Email us your requirements to contact@websitelearners.com
💬 𝗙𝗼𝗹𝗹𝗼𝘄 & 𝗖𝗵𝗮𝘁 𝘄𝗶𝘁𝗵 𝘂𝘀:
𝗜𝗻𝘀𝘁𝗮𝗴𝗿𝗮𝗺: https://www.instagram.com/websitelearners/
𝗙𝗮𝗰𝗲𝗯𝗼𝗼𝗸: https://www.facebook.com/websitelearners/
𝗧𝘄𝗶𝘁𝘁𝗲𝗿: https://twitter.com/websitelearners/