Whenever you move content, change domain names, or simply tweak a page’s URL, you’ll likely use a redirect. This ensures your users (and Google) get to the right page, and it preserves the SEO value from your backlinks.
You can use .htaccess redirects specifically to do this.
But I get that messing with your site’s server files can sound daunting.
So the goal of this guide is to make .htaccess redirects as accessible as possible.
To help, there are two free resources you’ll find in this post:
- A simple spreadsheet to automatically generate rules for the most common scenarios
- An .htaccess redirect cheat sheet that explains all symbols and flags used in redirect rules
I’ll explain when to use these below. But if you want, you can download them now and follow along with the resources.
Here’s the plan:
- We’ll start with a walkthrough to find your .htaccess file and get ready to make changes (feel free to skip this part if you have it ready to go)
- We’ll then go through the most common .htaccess redirect use cases in detail
- Then we’ll go through a cheat sheet of the symbols and flags you can use to build custom .htaccess rules
- Finally, we’ll show you how to make sure everything is working properly and how to pinpoint issues
Sound good? Let’s go.
How to Set Up .htaccess Redirects
Before you can create redirects, you need to access your .htaccess file. This file lives on your server and controls various aspects of how your website behaves.
It looks something like this (for a WordPress site in particular):
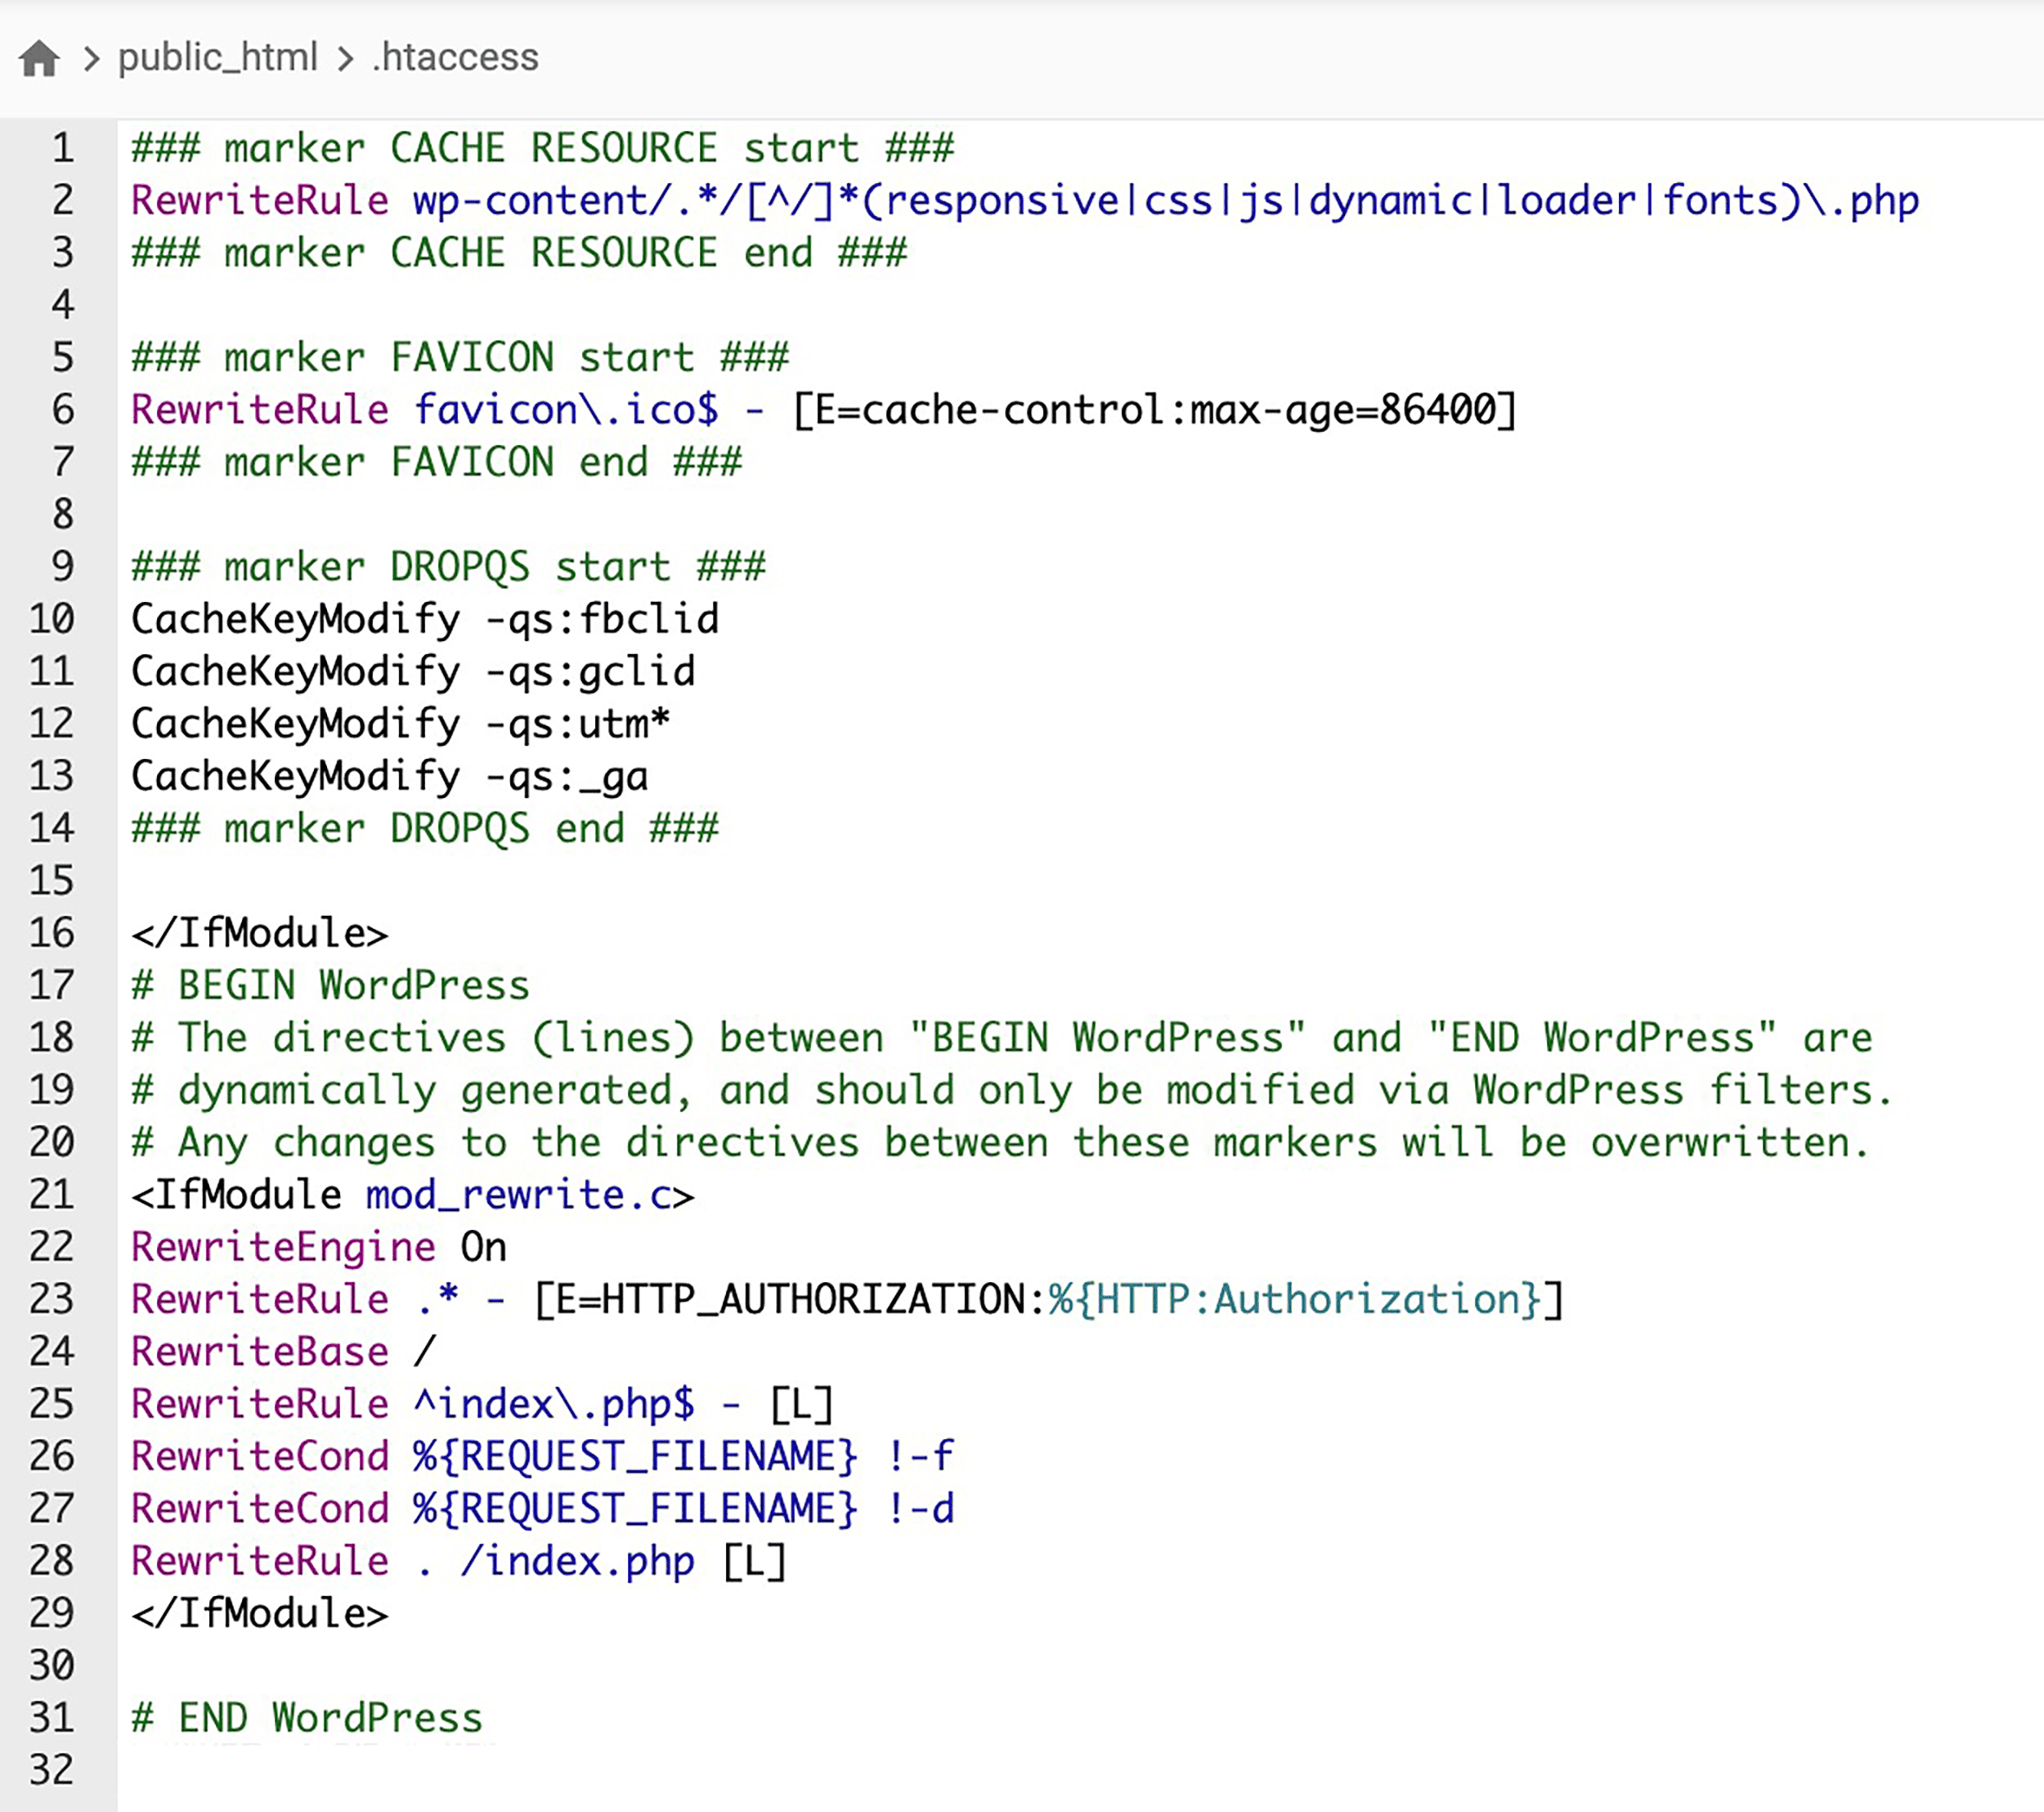
Note: You’ll only have an .htaccess file if your website runs on an Apache web server. If you’re not sure if your site does, get in touch with your developer.
There are two main ways to access and edit your .htaccess file:
- Through your hosting provider’s control panel
- Via an FTP client
I’d personally recommend the first option if you’re an absolute beginner. Or if you just want to keep the technical stuff to a minimum.
That’s not to say that using an FTP client is difficult (or that every hosting platform is a piece of cake to navigate). But generally, your file manager is going to be a bit more intuitive.
Important: Regardless of which method you use, always make a backup of your .htaccess file before editing it. One small mistake can bring your entire site down.
Editing .htaccess Through Your Hosting Control Panel
Most major hosting providers offer a file manager in their control panel that lets you edit files directly.
The general workflow looks something like this, although some of the specifics might vary between hosts:
- Log in to your hosting account
- Find the File Manager (usually in cPanel or a similar dashboard)
- Navigate to your website’s root directory (often called public_html)
- Find the .htaccess file
Note: Your .htaccess file might be hidden by default. If you don’t see it, look for an option to “Show Hidden Files” in your file manager settings.
Once you find it, you can usually right-click and select “Edit” to make changes.
As an example, here’s how the interface looks in the cPanel platform. First, I navigate to my domain’s website dashboard and find the file manager:

And in there I can see public_html:

I then click my .htaccess file:

Simple.
Via FTP
You can also use an FTP client like FileZilla, Cyberduck, or WinSCP. These give you similar access, but you can do it directly rather than through your hosting provider.
To get started, download and install an FTP client. We’ll go with Cyberduck for the example below.
Then connect to your server using your FTP credentials (your host can provide these — mine were under Files > FTP Accounts):
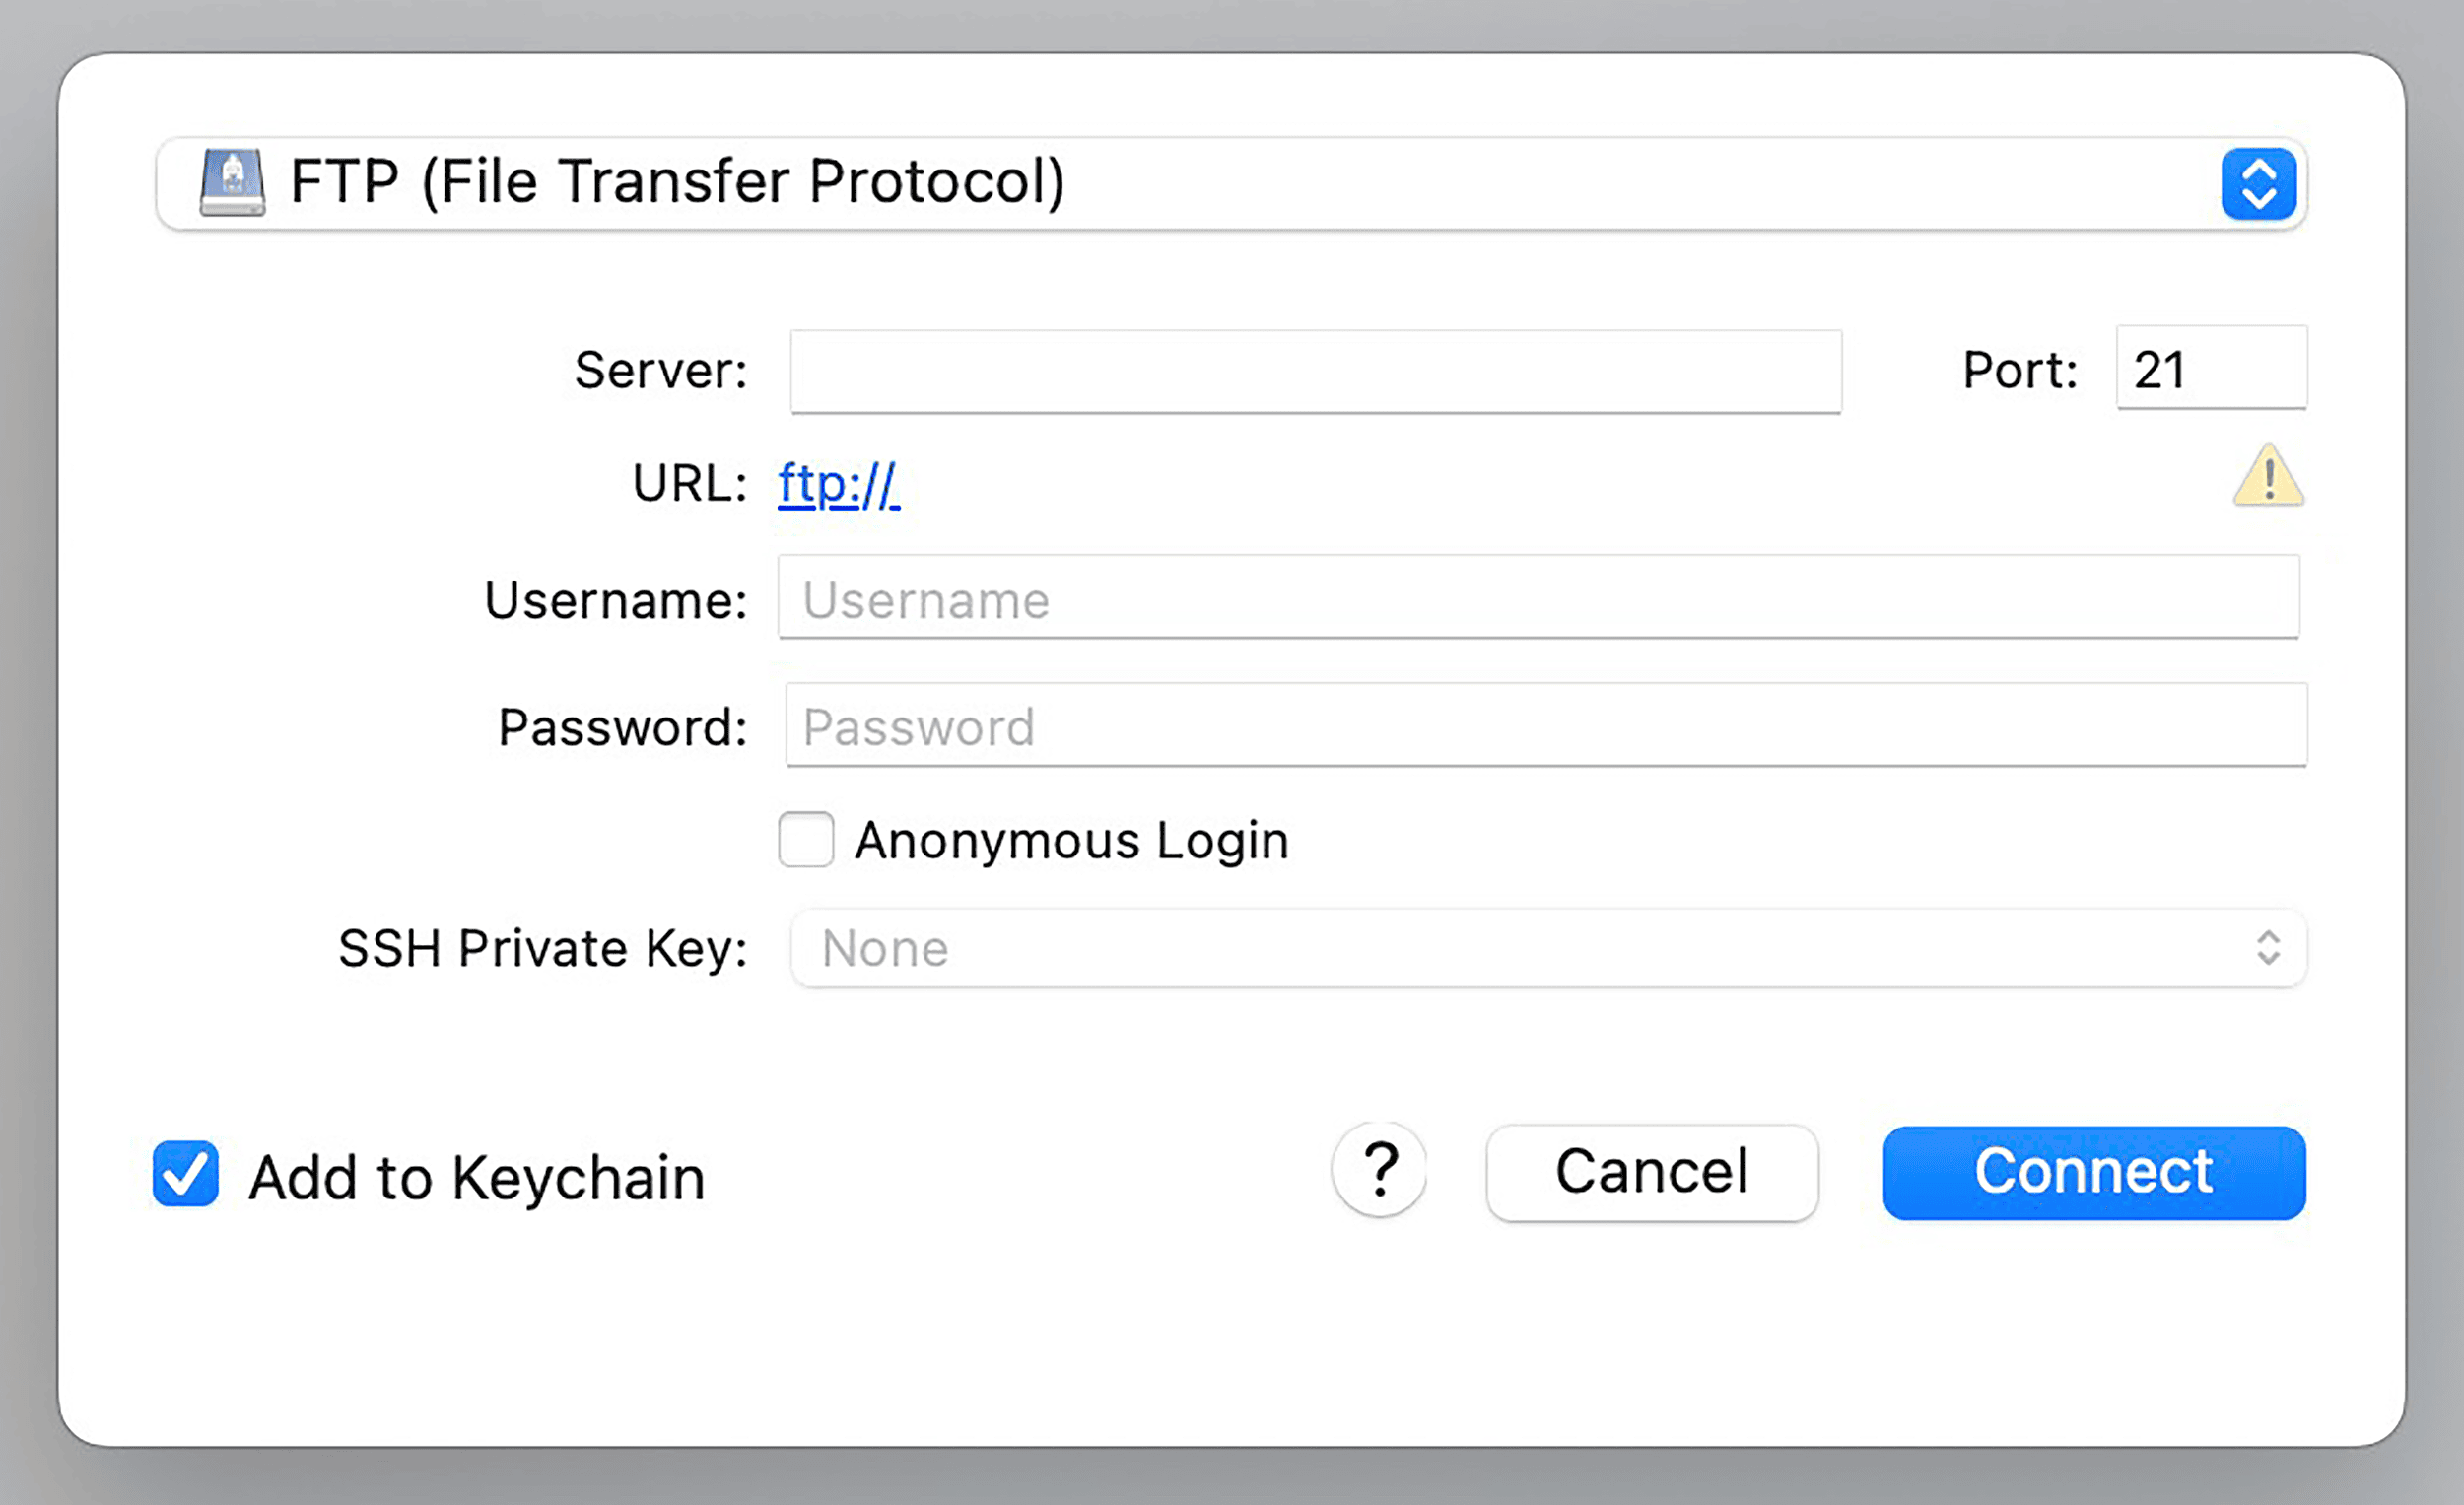
Then, within the FTP client, navigate to your site’s root directory.
It’s probably named public_html, which may open automatically. Then, find and download your .htaccess file:
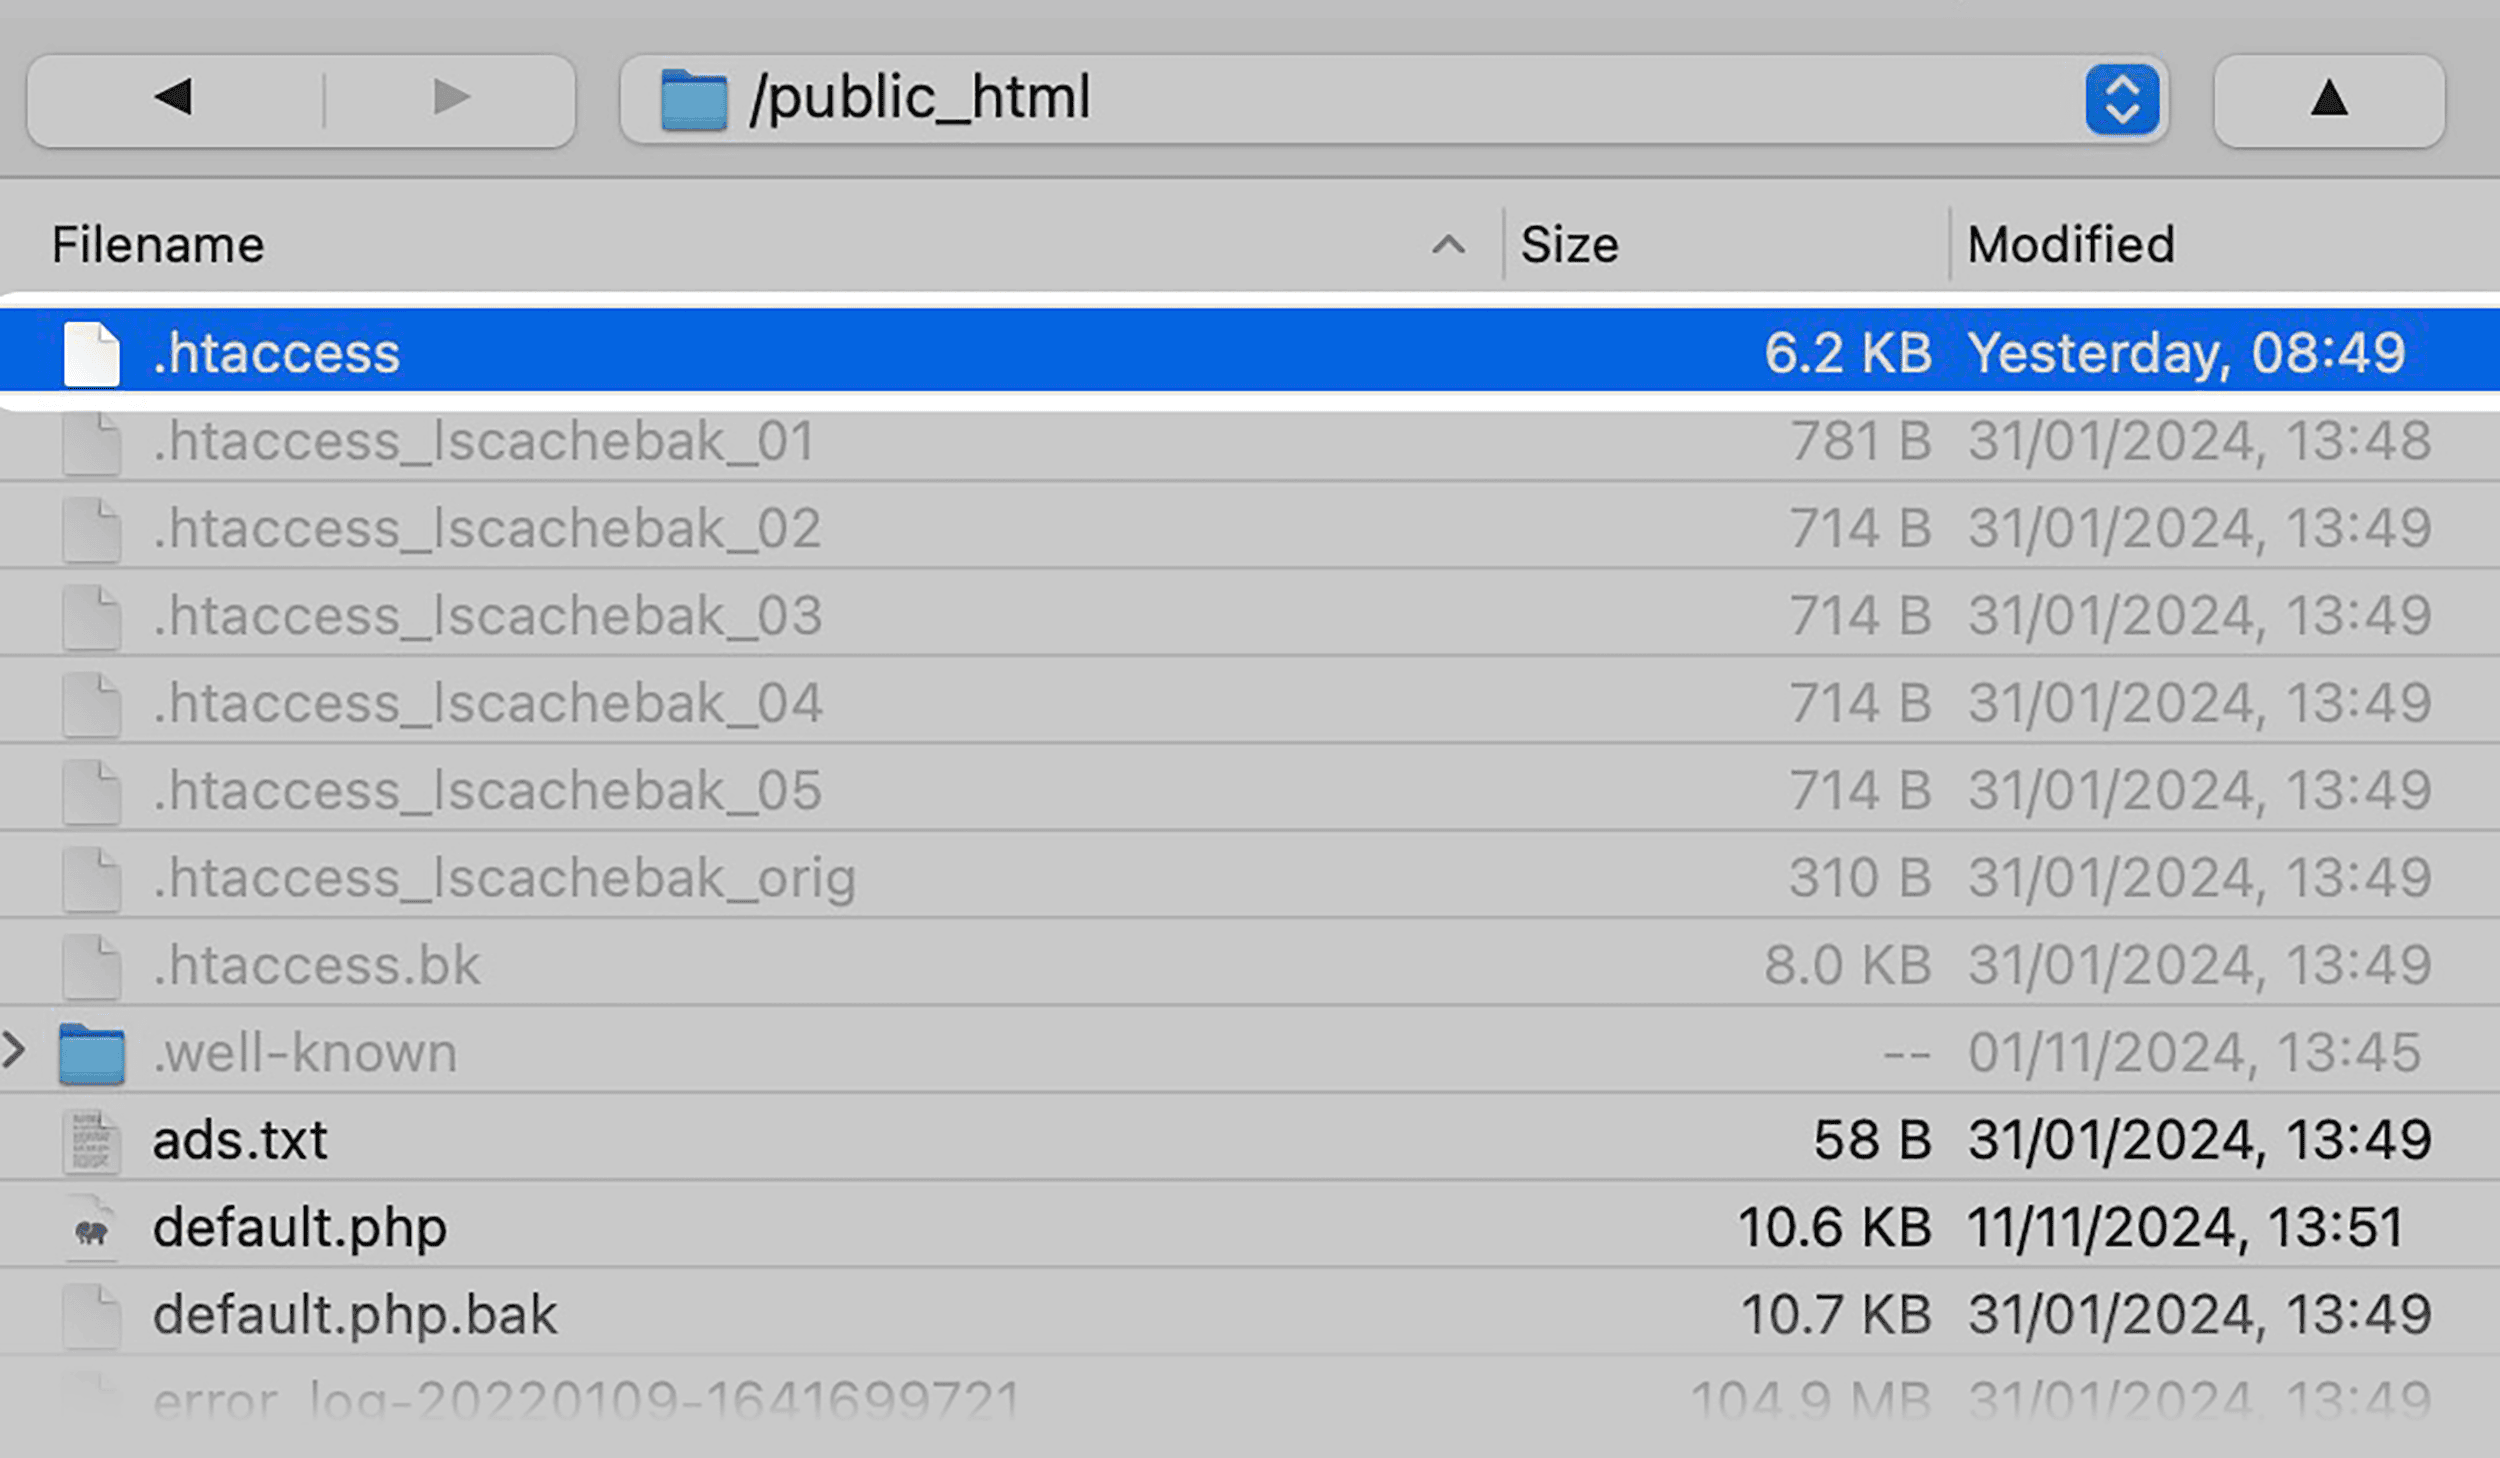
Note: I had to go to View > Show hidden files to see mine. No matter which FTP client you’re using, there’s a good chance you’ll need to do the same.
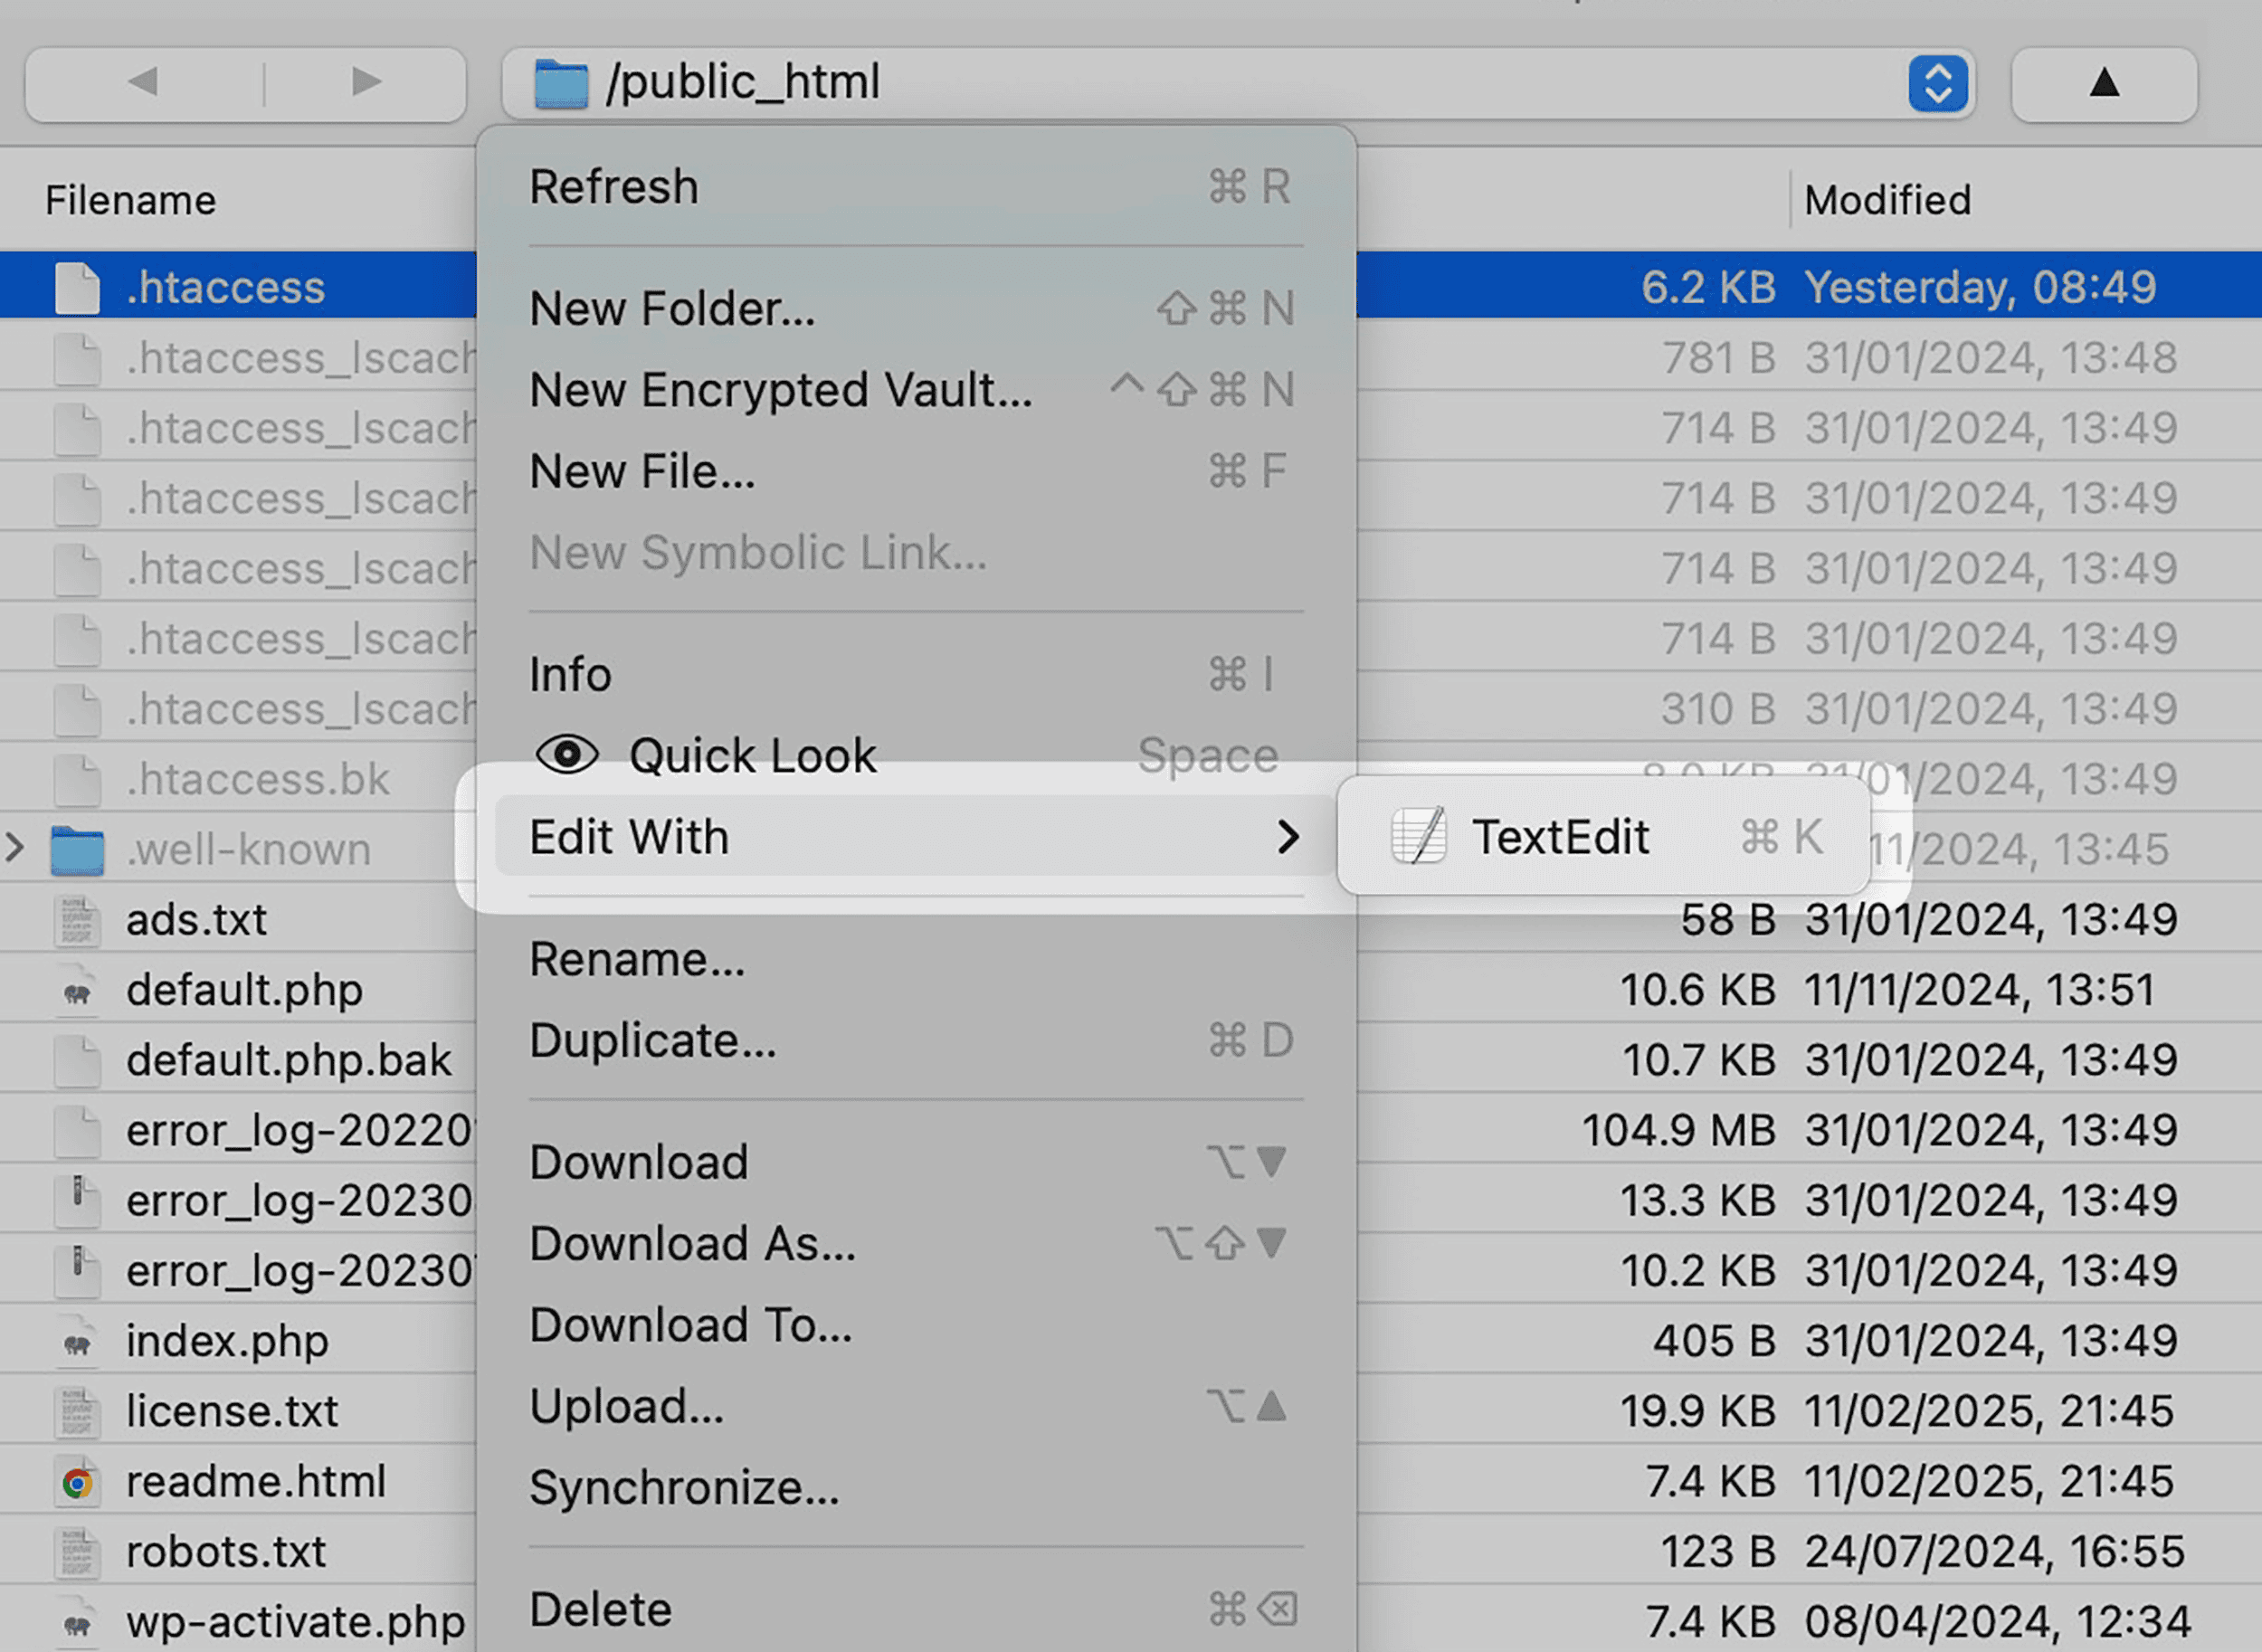
Make your changes in a text editor, and then upload the modified file back to the server. You might be able to skip the download/upload step and make edits directly, depending on the tool you use:
What About WordPress?
If you’re running a WordPress site, you usually don’t need to edit your .htaccess file to set up redirects.
Instead, you can use dedicated redirect plugins like Redirection or 301 Redirects.

These plugins are perfect if you’re not comfortable editing server files or if you just need to set up a couple of redirects quickly. But they won’t help you much for more complex redirections or when you’re performing a full site migration.
Other SEO plugins, like Rank Math, offer redirect managers alongside options to edit your .htaccess file within the WordPress dashboard:
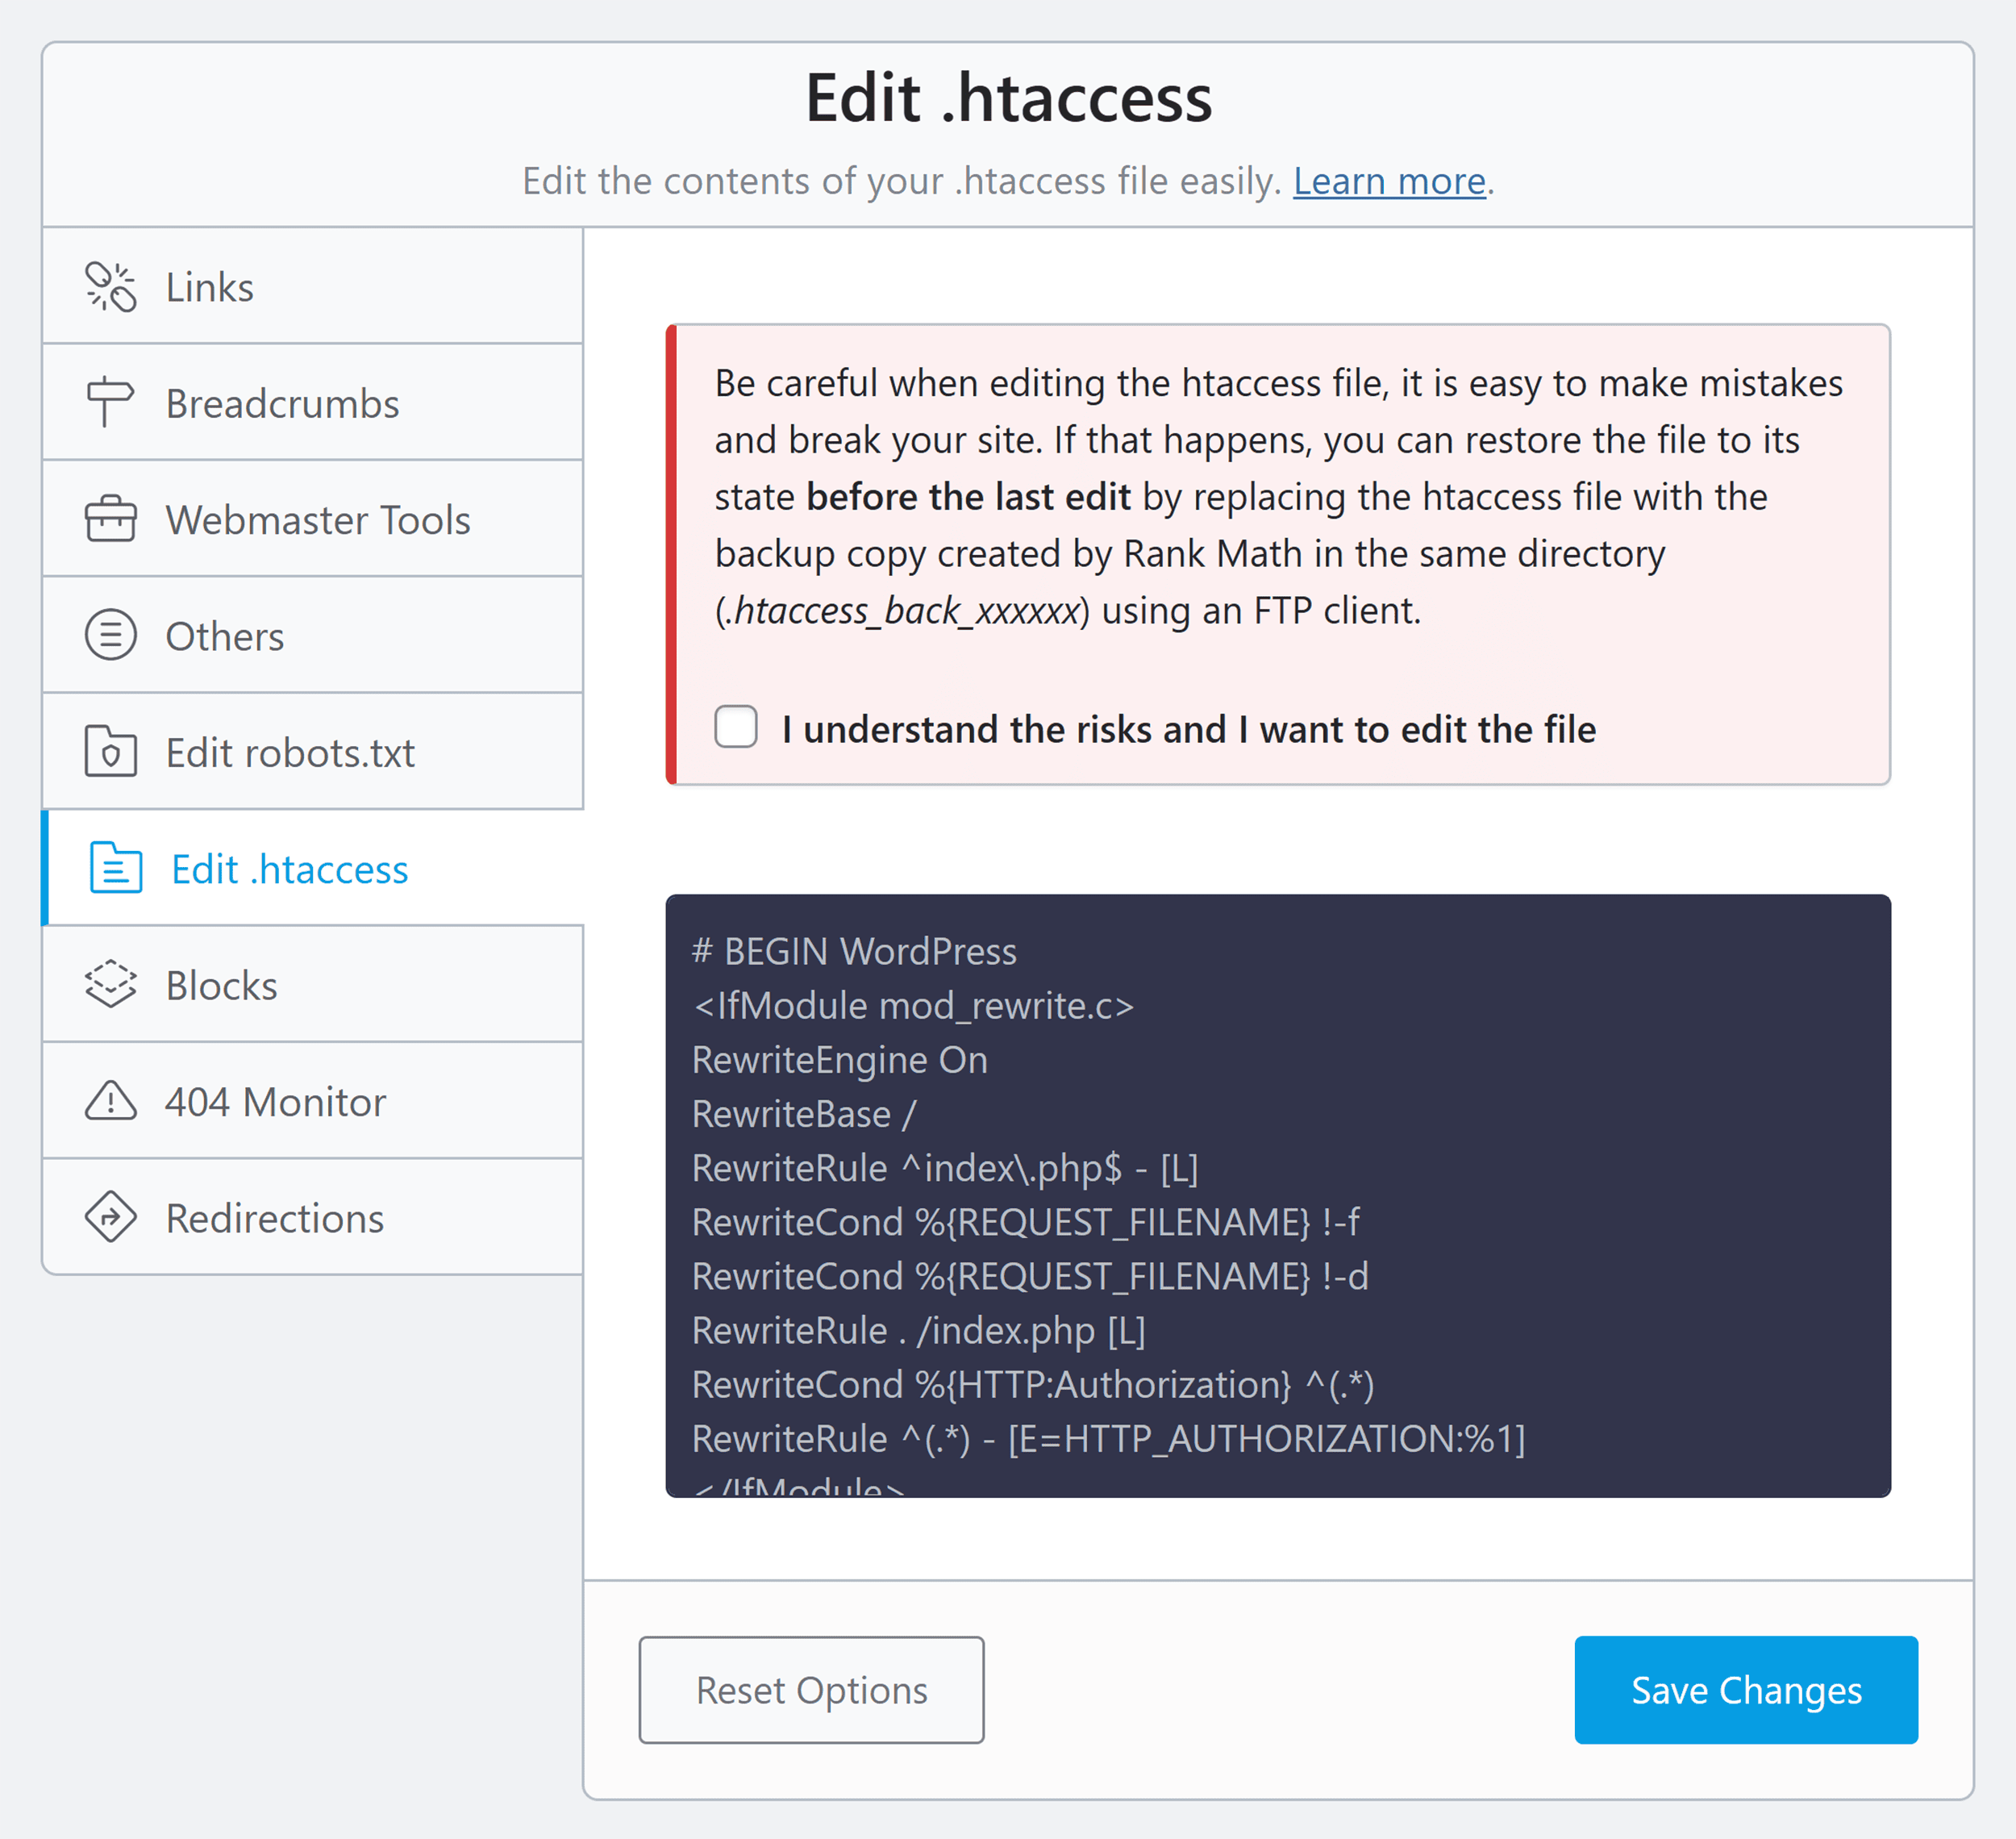
Adding redirects directly to your .htaccess file (or indirectly via a plugin like Rank Math) often results in faster performance since it cuts out the middleman (the plugin). And once you know how to do it, it’s not all that technical anyway.
(It won’t always be the best option from a performance perspective. But generally it’s going to be faster.)
Other platforms like Shopify and Wix don’t give you direct access to .htaccess files. In these cases, you’ll need to use the platform’s built-in redirect tools instead.
The same may be true for WordPress site owners if your site runs on WordPress.com, rather than external hosting with a WordPress.org installation.
Further reading: WordPress Redirects Made Easy: Plugin & Code Methods
Before You Begin: Important Prerequisites
Before you start making changes to your .htaccess file, bear the following in mind:
- You need to have an .htaccess file: If you don’t already have an .htaccess file, you can create one in your public_html folder (WordPress will often create one for you automatically).
- It’s easy to make mistakes: Making changes to your .htaccess file without knowing what you’re doing can have major consequences for your site. Ideally consult with your developer before implementing .htaccess redirects, and make any major changes on a staging site if possible to make sure they work properly.
- The rules below are just guides: I’ve included lots of examples of redirect rules below with explanations of what they do. But you may need to modify them to ensure they work properly on your site.
- Enable mod_rewrite: Most modern hosting environments will enable the mod_rewrite module by default (which you want, and therefore likely don’t need to worry about). If your redirects aren’t working, reach out to your hosting provider to see if this is the problem.
- Enable Options + FollowSymLinks: You may or may not need to enable this in your .htaccess file (usually you won’t need to worry about it). Again, reach out to your host if you’re not sure.
Now that you know how to actually get into and edit your .htaccess file, let’s look at how to create different types of redirects.
Free resource: Make your life even easier with our handy .htaccess redirect cheat sheet. Just add your domain or URLs to automatically generate rules you can copy and paste into your .htaccess file.
How to Redirect a Single URL
Redirecting a single URL to another is probably the most common redirect you’ll create. It’s perfect for when you’ve:
- Changed a page’s URL structure
- Merged two pages into one
- Moved specific content to a new location

This type of redirect is straightforward and requires just one line of code in your .htaccess file.
Note: As with all the redirects I’ll discuss below, you need to make sure the new page is a live URL. Otherwise, the user or search engine will run into a 404 error as it’s a broken link. While a powerful file, .htaccess doesn’t automatically create the new pages for you.
Here’s the code you’ll need to add to your .htaccess file (swapping out the URL path and domain for your own):
Redirect 301 /old-page https://yoursite.com/new-page
Let’s break down what this means:
- Redirect: Tells the server you want to create a redirect
- 301: Specifies a permanent redirect (more on this below)
- /old-page: The path of the original page (relative to your root directory)
- https://yoursite.com/new-page: The full URL of the destination page
Important: For the first part (old page), you only need the path without your domain name. For the second part (new page), you need the complete URL, including https:// and your domain.
Single URL Redirect Example
Let’s say you have a page about dog training at:
https://yourpetsite.com/5-great-tips-for-training-dogs/
And you’ve moved it to:
https://yourpetsite.com/dog-training-tips/
Your redirect code would look like this:
Redirect 301 /5-great-tips-for-training-dogs/ https://yourpetsite.com/dog-training-tips/
Note: No matter which type of .htaccess redirect you use, make sure you stay consistent with regard to your site’s URL structure. Specifically, if you include a trailing slash at the end of your URLs (e.g., /page-1/), make sure you include that in your redirect rules.
Permanent vs. Temporary Redirects
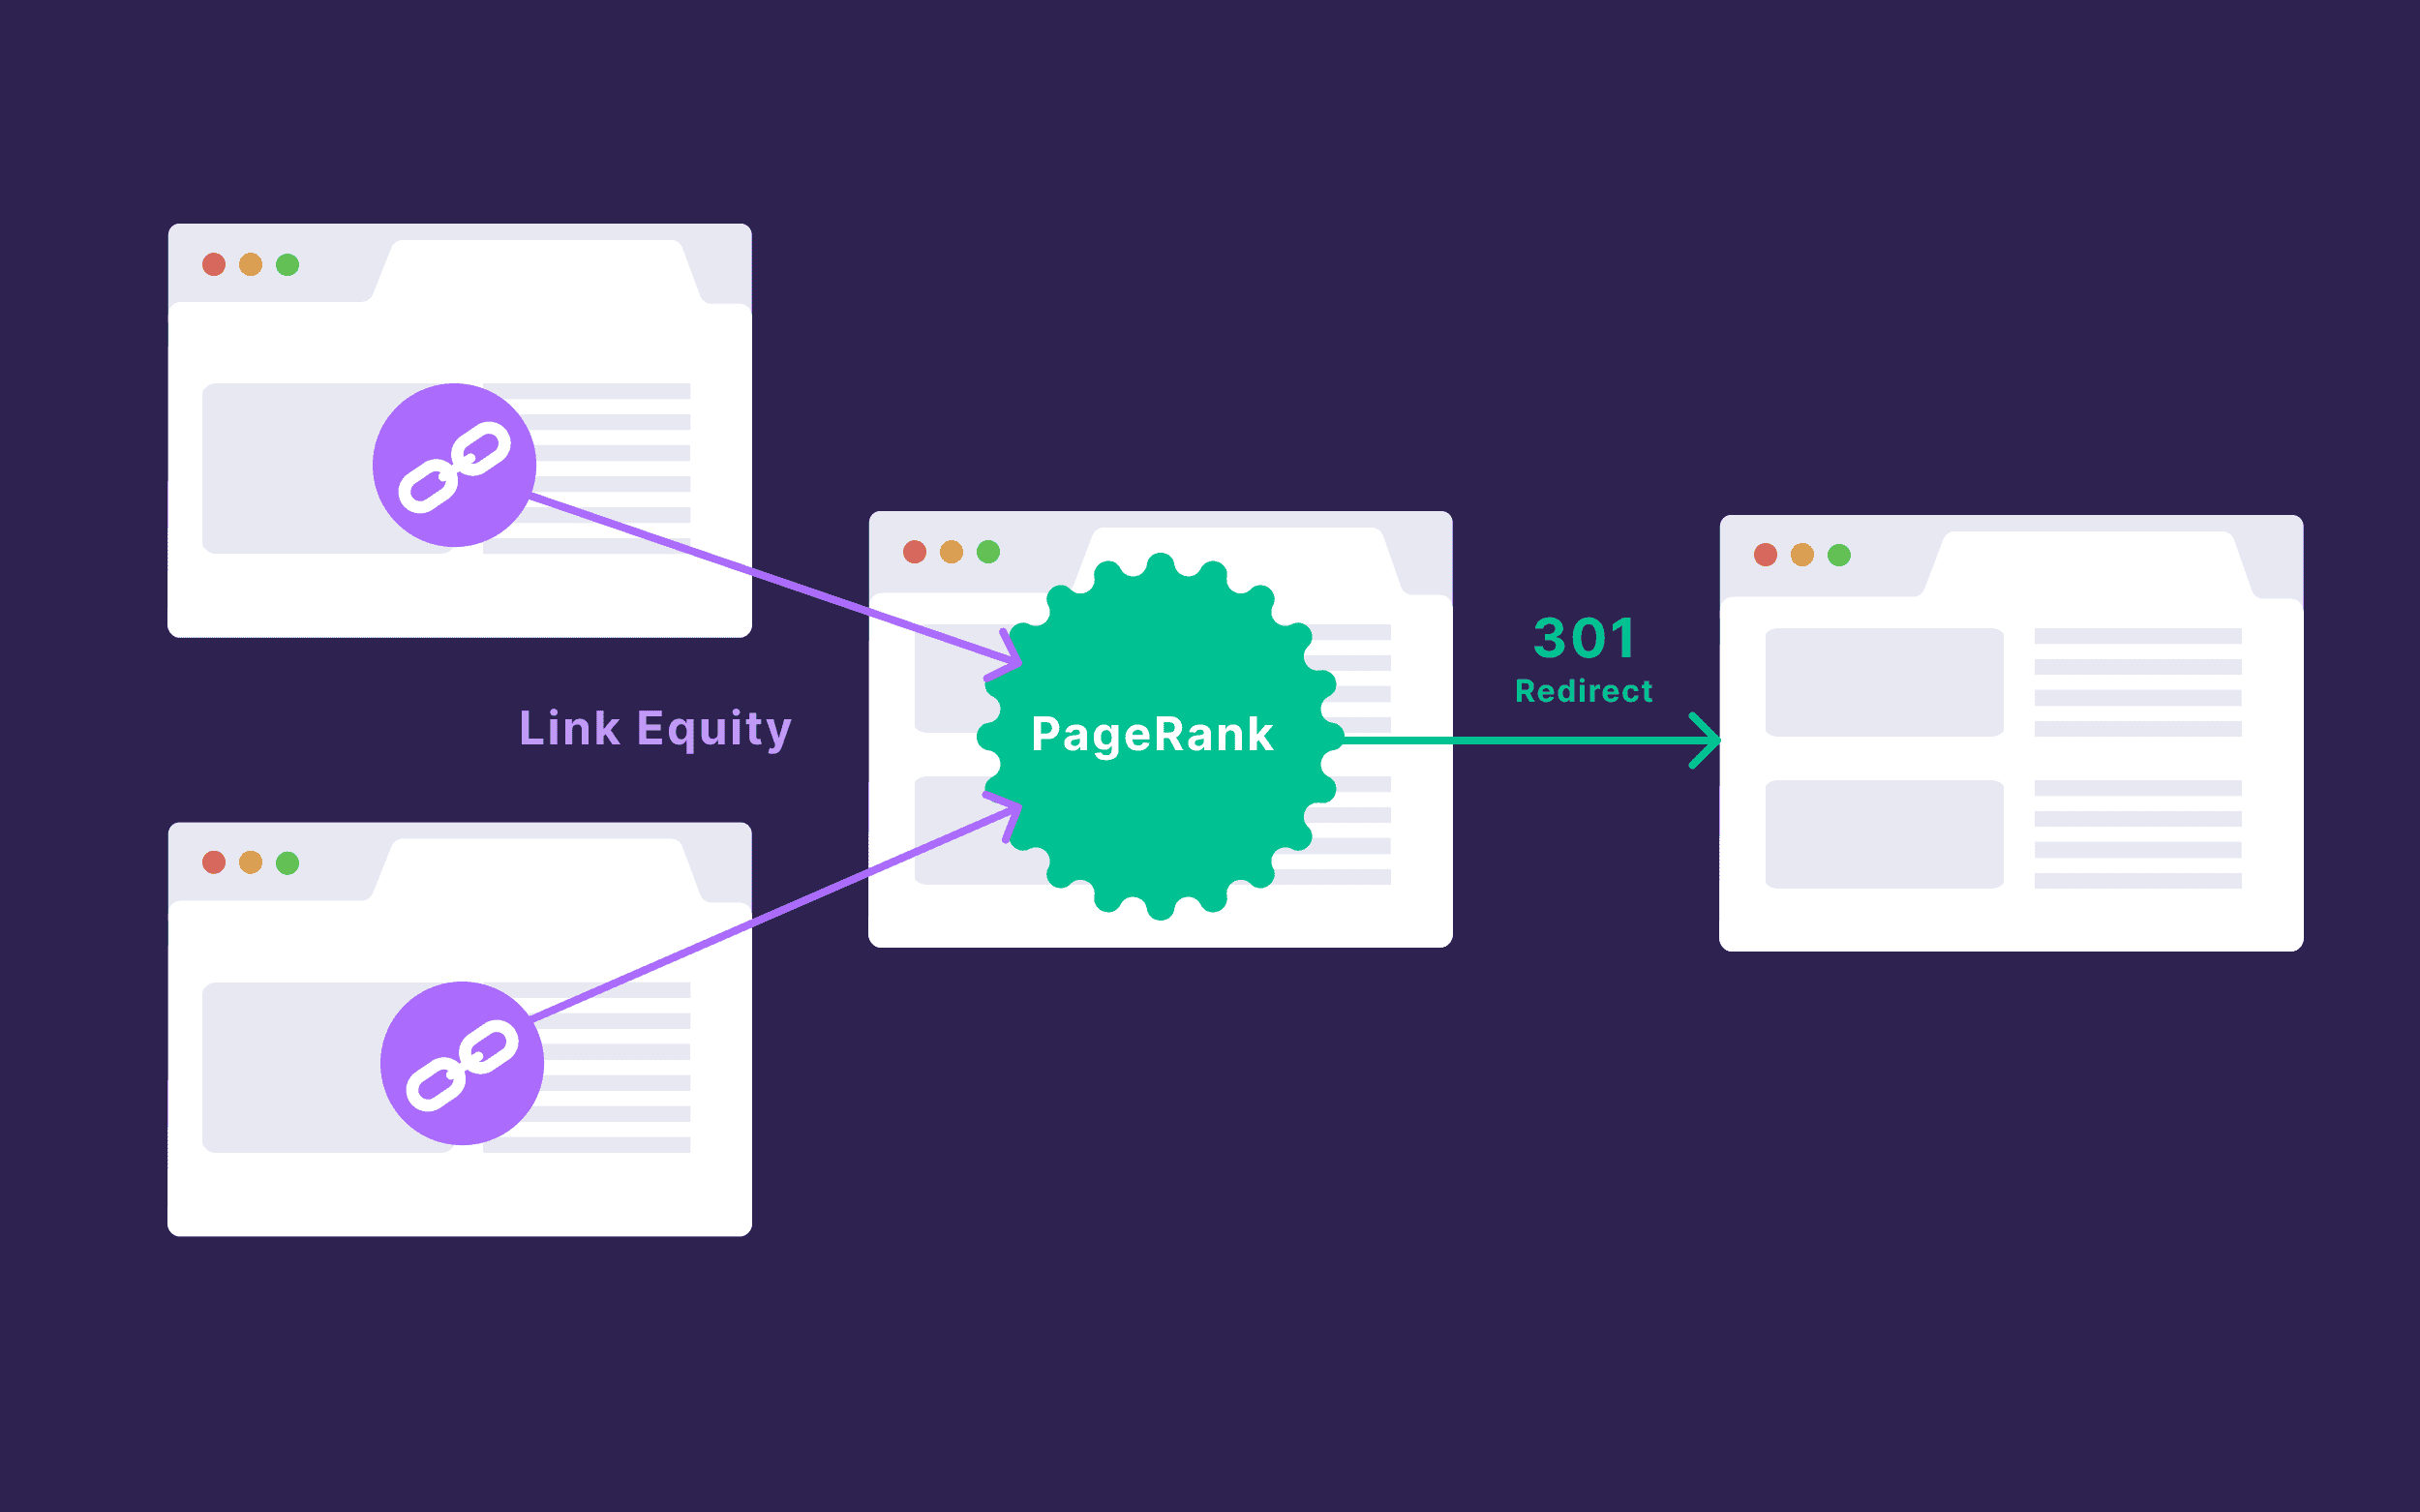
The 301 in our example above indicates a permanent redirect. This tells search engines to update their index with the new URL and transfer the SEO value from the old page to the new one.
If you’re only redirecting temporarily (like for maintenance or a seasonal promotion), use 302 instead:
Redirect 302 /sale https://yoursite.com/spring-sale
If you’re trying to preserve SEO rankings (and your website’s authority), always use 301 redirects for permanent URL changes. Search engines treat 301s as permanent and 302s as temporary, which affects how they transfer link equity.
How to Redirect a Subfolder
Sometimes you need to redirect an entire section of your website rather than just a single page. This is common when you are:
- Reorganizing your site structure
- Moving a blog or product category to a new location
- Consolidating content from multiple sections
Redirecting a subfolder automatically handles all pages within that folder. So you don’t need to set up individual redirect rules for each one.
Here’s the code to add to your .htaccess file:
RewriteEngine On

RewriteRule ^old-folder/(.*)$ /new-folder/$1 [R=301,L]
Let’s break down the key parts:
- RewriteEngine On: Activates Apache’s rewrite module (required for this type of redirect*)
- ^old-folder/: Matches the beginning of URLs that start with your old folder
- (.*)$: Captures everything after the folder name
- /new-folder/$1: Sends visitors to the new folder, maintaining the rest of the URL path
- [R=301,L]: Specifies a permanent redirect and tells the server to stop processing rules after this match
You don’t need to know what this means. But it’s an important line to include for some .htaccess redirect rules. You only need to include it once (unless you also have “RewriteEngine Off” in your file before a given rule).
Subfolder Redirect Example
Let’s say you have a blog at:
https://yoursite.com/blog/post-name
And you want to move it to:
https://yoursite.com/articles/post-name
Your redirect code would look like this:
RewriteEngine On
RewriteRule ^blog/(.*)$ /articles/$1  [R=301,L ]
This will redirect:
- /blog/first-post to /articles/first-post
- /blog/category/tech to /articles/category/tech
- Any other path that starts with /blog/ to the relevant /articles/ path
Important: Order Matters
The order of your .htaccess rules matters. This isn’t going to be an issue if you’re just redirecting a single URL.
But if you want to redirect some parts of a subfolder to one place and others elsewhere, you need to be careful.
Let’s look at an example to make this clearer:
Imagine you have a blog subfolder with a special /featured/ section. You want to redirect your /blog/ content to an /articles/ subfolder, but the featured posts should go to /featured-content/.
Here’s the WRONG order:
RewriteEngine On
RewriteRule ^blog/(.*)$ /articles/$1 [R=301,L]
RewriteRule ^blog/featured/(.*)$ /featured-content/$1 [R=301,L]
Why is this incorrect?
Because any time a user (or Google) requests a URL on your site (say, your site.com/blog/featured/your-post/), Apache first checks if it matches the /blog/ structure.
In this case, it does. So it would redirect:
yoursite.com/blog/featured/your-post/
To:
yoursite.com/articles/your-post/
The URL no longer matches the /blog/featured/ structure, so the second rule would never apply to it. Meaning all your featured posts would just redirect to the new /articles/ subfolder.
Here’s the correct order:
RewriteEngine On
RewriteRule ^blog/featured/(.*)$ /featured-content/$1 [R=301,L]
RewriteRule ^blog/(.*)$ /articles/$1 [R=301,L]
This first checks for the /blog/featured/ structure and redirects it to the new /featured-content/. So your post at:
yoursite.com/blog/featured/your-post/
Would redirect to:
yoursite.com/featured-content/your-post/
And then in this case it no longer matches the /blog/ structure, so the second rule wouldn’t apply. Which is what we want.
For any non-featured blog URLs, like yoursite.com/blog/post-2/, they’d redirect per the second rule to yoursite.com/articles/post-2/ (because the first rule wouldn’t apply to them without the /featured/ part of the URL).
Redirecting a Subfolder to a Different Domain
Before I show you how to redirect your entire site to a new domain, it’s worth noting that you can also redirect a subfolder to a completely different domain. This is useful if you’ve moved a section of your site to a new website.
Here’s the rule to use:
RewriteEngine On
RewriteRule ^old-folder/(.*)$ https://newdomain.com/folder/$1 [R=301,L]
For example, you could use this if you moved your support section to a dedicated support site:
RewriteEngine On
RewriteRule ^support/(.*)$ https://support.yourcompany.com/$1 [R=301,L]
How to Redirect to a New Domain
Moving to a new domain is a big step. Whether you’re rebranding, switching from a .org to a .com domain, or consolidating multiple websites, you need to make sure your visitors (and search engines) can find your new site.
A domain-wide redirect ensures anyone visiting your old domain automatically lands on your new one. This preserves both the user experience and authority you’ve built up through backlinks.
Here’s the code to add to your .htaccess file on your old domain:
RewriteEngine On
RewriteCond %{HTTP_HOST} ^(www.)?olddomain.com$ [NC]
RewriteRule ^(.*)$ https://newdomain.com/$1 [L,R=301]
Let’s break down what this does:
- RewriteEngine On: Activates the rewrite module
- RewriteCond %{HTTP_HOST} ^(www.)?olddomain.com$ [NC]: Checks if someone is trying to access your old domain, where:
- ^(www.)?: Matches both www and non-www versions of your site
- [NC]: Makes the match not case-sensitive (so OLDDOMAIN.com would also match)
- RewriteRule ^(.*)$ https://newdomain.com/$1 [L,R=301]: Sets up a permanent redirect to the new domain, where:
- ^(.*)$: Captures the entire URL path after the domain
- https://newdomain.com/$1: Redirects to the same path on your new domain
- [L,R=301]: Makes it a permanent redirect and stops processing other rules for that request
Remember: If you already have RewriteEngine On elsewhere in your .htaccess file (and you don’t also have RewriteEngine Off), you don’t need to add it again.
Domain Redirect Example
Let’s say you’re changing from:
https://pettraining.com/dog-care/grooming
To:
https://pawacademy.com/dog-care/grooming
The redirect will automatically maintain the same path structure. This means visitors to any page on your old domain will land on the corresponding page on your new domain. (You’ll obviously need to have corresponding URLs on the new domain.)
Important: You need to place this .htaccess rule on your old domain’s server, not the new one.
Domain migrations require careful planning. But when you do it properly, they can transfer most of your SEO value and ensure your audience can find your new online home. For more on how to do it right, check out our website migration checklist.
Redirect www to Non-www (or Vice Versa) on New Domain
If you’re also changing from www to non-www (or vice versa) during your domain migration, you can combine these redirects:
RewriteEngine On

# First redirect old domain to new domain
RewriteCond %{HTTP_HOST} ^(www.)?olddomain.com$ [NC]
RewriteRule ^(.*)$ https://newdomain.com/$1 [L,R=301]

# Then handle www to non-www on new domain
RewriteCond %{HTTP_HOST} ^www.newdomain.com$ [NC]
RewriteRule ^(.*)$ https://newdomain.com/$1 [L,R=301]
How to Redirect HTTP to HTTPS
Redirecting from HTTP to HTTPS isn’t just a good practice — it’s practically mandatory. HTTPS encrypts the connection between your visitors and your website. This protects sensitive information, while also being a light Google ranking factor.
(I’m not suggesting you redirect to HTTPS for a ranking boost. It really is just the default best practice nowadays more than anything else.)

If you’ve installed an SSL certificate but visitors can still access your site through unencrypted HTTP, you’ll want to set up a redirect to ensure everyone gets the secure version.
Here’s the code to add to your .htaccess file:
RewriteEngine On
RewriteCond %{HTTPS} off
RewriteRule ^(.*)$ https://%{HTTP_HOST}%{REQUEST_URI} [L,R=301]
This is what each part does:
- RewriteEngine On: Activates the rewrite module
- RewriteCond %{HTTPS} off: Checks if the connection is currently not using HTTPS
- ^(.*)$: captures the entire URL path
- https://%{HTTP_HOST}%{REQUEST_URI}: Redirects to the same URL but with https:// instead of http://
- [L,R=301]: Makes it a permanent redirect and stops processing other rules
This redirect will change:
http://yourwebsite.com/products/item
To:
https://yourwebsite.com/products/item
The redirect preserves the entire URL structure — only the protocol changes from HTTP to HTTPS.
Unlike other redirects, you don’t need to customize this code with your domain name. The %{HTTP_HOST} variable automatically uses whatever domain the visitor is trying to access.
In other words: you can just copy and paste this in as is.
BUT:
Before adding this redirect, make sure:
- You have a valid SSL certificate installed on your server
- All site resources (images, scripts, etc.) are accessible via HTTPS
- Your site functions properly when accessed via HTTPS
- Your SSL certificate covers all subdomains if you’re redirecting them to HTTPS as well
And most importantly: make sure you don’t already have a method in place to force HTTPS, as this can cause redirect loops and other potential performance issues.
While .htaccess is one way to implement HTTPS redirects, you may have other options (perhaps ones that are already doing this for you):
- Hosting control panel: Many hosting providers offer one-click HTTPS enforcement through their control panel (maybe even doing it by default)
- WordPress settings: If you’re using WordPress, check the “WordPress Address” and “Site Address” settings under Settings > General (both should start with https://)
- Plugin solutions: WordPress plugins like Really Simple SSL can handle the redirect for you
How to Redirect WWW to Non-WWW
Should your website be www.yoursite.com or just yoursite.com? This seemingly small detail actually matters a lot for consistency, user experience, and SEO.
Having both versions accessible can create duplicate content issues. So you should pick one format and redirect the other to it.
In most cases, there’s no definitive technical advantage to either format.
But non-WWW is shorter, cleaner, and easier to say in conversation.
Most modern websites lean toward the non-www version, but either choice is fine as long as you’re consistent.
Let’s look at how to redirect the www version to the non-www version (then I’ll show you how to reverse this if you prefer www).
Here’s the code to add to your .htaccess file:
RewriteEngine On

RewriteCond %{HTTP_HOST} ^www.(.*)$ [NC]

RewriteRule ^(.*)$ https://%1/$1 [L,R=301]
Breaking this down:
- RewriteEngine On: Activates the rewrite module
- RewriteCond %{HTTP_HOST} ^www.(.*)$ [NC]: Checks if the URL starts with “www” where:
- (.*)$: Captures the domain name without the www
- ^(.*)$: Captures the entire path after the domain
- https://%1/$1: Redirects to the same URL without www where:
- %1: Refers to the domain captured in the RewriteCond
- $1: Refers to the page path
- [L,R=301]: Makes it a permanent redirect and stops processing other rules
This redirect will change:
https://www.yourbusiness.com/about-us
To:
https://yourbusiness.com/about-us
What About Non-WWW to WWW?
If you prefer the www version instead, simply reverse the logic (you need an extra RewriteCond line as well):
RewriteEngine On

RewriteCond %{HTTP_HOST} !^www. [NC]

RewriteCond %{HTTP_HOST} ^(.*)$ [NC]

RewriteRule ^(.*)$ https://www.%1/$1 [L,R=301]
This checks if the URL does NOT start with www and then adds it.
This is another rule you can simply copy and paste into your .htaccess file. But as with HTTP redirects, you need to make sure you’re not already redirecting via another method. Otherwise you might run into redirect loops and other issues.
Outside of your .htaccess file, you can force www/non-www via:
- DNS settings: Some DNS providers let you set a preferred version when configuring your domain
- Hosting control panel: Many hosts offer settings to enforce www or non-www
- WordPress settings: In WordPress, check the “WordPress Address” and “Site Address” fields under Settings > General (both should use your preferred format)
Make sure to test all versions of your domain to ensure they all lead to your preferred version:
- http://yoursite.com
- http://www.yoursite.com
- https://yoursite.com
- https://www.yoursite.com
All four should ultimately end up at the same place (ideally https://yoursite.com if you’re going with non-www, or https://www.yoursite.com if you prefer www).
Other Types of .htaccess Redirect
While the above covers the most common .htaccess redirect scenarios, the file is incredibly versatile and can handle many other specialized redirect situations.
Let’s explore some other redirect types that might come in handy for specific use cases.
Note: As with any .htaccess rules, it’s easy to make small mistakes here that can have big consequences, and you may need to modify the examples below to work with your specific situation. So consult your developer if possible.
Redirect Based on Query Parameters
Sometimes you need to redirect based on what appears after the question mark in a URL. These are URL parameters, and they’re useful for tracking and organizing site content.
Here’s an example .htaccess redirect rule for managing URL parameters (also known as query strings):
RewriteEngine On

RewriteCond %{QUERY_STRING} ^product=widget$

RewriteRule ^products.php$ /widgets/? [L,R=301]
This redirects /products.php?product=widget to /widgets/ while removing the query string.
The question mark at the end of the destination URL tells the server to strip the original query parameters rather than passing them along.
Redirect to a Specific Port
If you need to redirect to a different port (like for a development environment), use this rule:
RewriteEngine On

RewriteRule ^dev/(.*)$ http://localhost:8080/$1 [L,R=301]
This would redirect requests for /dev/page to http://localhost:8080/page.
Custom Error Page Redirects
You can set up custom pages for various HTTP error codes.
For example, you can send users and search engines to dedicated error pages:
ErrorDocument 404 /custom-404

ErrorDocument 500 /server-error
While these aren’t technically redirects (they’re error handlers), they help provide a better user experience when things go wrong.
Temporary vs. Permanent Redirects
We’ve mostly covered 301 (permanent) redirects, but 302 (temporary) redirects are useful for:
- Maintenance pages
- Seasonal promotions
- A/B testing
To create a temporary redirect, simply change the 301 to 302:
Redirect 302 /sale /summer-sale
When using temporary redirects for maintenance, you can create a rule that excludes your IP address so you can still access the original page:
RewriteEngine On

RewriteCond %{REMOTE_ADDR} !^123.456.789.0

RewriteRule ^(.*)$ /maintenance [R=302,L]
Where 123.456.789.0 is your IP address.
Redirecting Specific File Types
You can also redirect requests for specific file types, like PDFs:
RewriteEngine On

RewriteRule ^(.*).pdf$ /documents/$1.pdf [L,R=301]
This moves all PDF files to a /documents/ folder.
Redirect to Force Trailing Slash
For consistency, you might want all URLs to either have or not have a trailing slash:
RewriteEngine On

RewriteCond %{REQUEST_FILENAME} !-f

RewriteRule ^(.*[^])$ /$1/ [L,R=301]
This adds a trailing slash to all URLs that don’t represent actual files.
Htaccess Redirects Symbols Explained (+ Cheat Sheet)
The symbols in .htaccess redirects can look cryptic at first glance. Those carets, dollar signs, and brackets serve important purposes that aren’t immediately obvious.
Rather than trying to learn what they all do, below is a handy reference you can return to whenever you need to create or modify your redirects.
Free resource: Download this cheat sheet here.
Common .htaccess Symbols
| Symbol | Name | What It Does | Example |
|---|---|---|---|
| ^ | Caret | Matches the beginning of a string | ^blog matches URLs that start with “blog” |
| $ | Dollar sign | Matches the end of a string | .html$ matches URLs that end with “.html” |
| () | Parentheses | Groups patterns and captures matched content | (.*?) captures content to be used later |
| $1, $2… | Dollar sign with number | References captured groups in RewriteRule | /$1.html inserts the first captured group |
| %1, %2… | Percent with number | References captured groups in RewriteCond | https://%1 uses the domain captured in a condition |
| . | Period | Matches any single character | a.c matches “abc”, “adc”, etc. |
| * | Asterisk | Matches zero or more of the preceding character | a* matches “”, “a”, “aa”, “aaa”, etc. |
| + | Plus | Matches one or more of the preceding character | a+ matches “a”, “aa”, “aaa”, etc. (but not “”) |
| ? | Question mark | Makes the preceding character optional | colou?r matches both “color” and “colour” |
| [ | Square brackets | Contains flags or defines a character set | [L,R=301] sets flags; [a-z] matches lowercase letters |
| Backslash | Escapes special characters | . matches a literal period rather than any character | |
| | | Pipe | Acts as OR operator | cat|dog matches “cat” or “dog” |
Flag Options
| Flag | Full Name | Purpose |
|---|---|---|
| L | Last | Stops processing rules if this one matches |
| R=301 | Redirect (301) | Creates a permanent redirect |
| R=302 | Redirect (302) | Creates a temporary redirect |
| NC | No Case | Makes the match case-insensitive |
| QSA | Query String Append | Adds query parameters from the original URL |
| F | Forbidden | Returns a 403 Forbidden status |
| G | Gone | Returns a 410 Gone status (resource permanently removed) |
| PT | Pass Through | Passes the request to other modules for further processing |
RewriteCond Variables
| Variable | What It Contains |
|---|---|
| %{HTTP_HOST} | Domain name from the request (e.g., example.com) |
| %{REQUEST_URI} | The path part of the URL (e.g., /folder/page/) |
| %{QUERY_STRING} | Everything after the ? in a URL |
| %{REQUEST_FILENAME} | The full path to the requested file |
| %{HTTP_USER_AGENT} | Information about the visitor’s browser |
| %{HTTPS} | “on” if the connection is secure, “off” otherwise |
| %{REMOTE_ADDR} | The visitor’s IP address |
Pattern Matching Examples
Here are a few examples of the kinds of rules you can set up once you get the hang of all the symbols, flags, and variables:
URL Paths
- ^about$ matches ONLY the exact URL “/about” (not “/about-us” or “/about/team”)
- ^about(.*) matches “/about” plus anything after it (“/about-us”, “/about/team”, etc.)
File Types
- .(pdf|docx|xlsx)$ matches URLs ending in .pdf, .docx, or .xlsx (for specific file handling)
- ^((?!.html).)*$ matches any URL that does NOT end with .html (for handling non-HTML requests)
Flag Variations
- RewriteRule ^blog/(.*)$ /articles/$1 [R=301,L] creates a permanent (301) redirect that browsers and search engines will cache
- RewriteRule ^blog/(.*)$ /articles/$1 [R=302,L] creates a temporary (302) redirect that won’t be permanently cached by browsers (useful during site testing)
Variable Conditions
- RewriteCond %{HTTP_HOST} example.com matches requests specifically to example.com (case-sensitive, excludes www.example.com)
- RewriteCond %{REQUEST_URI} ^/blog/articles matches URLs with path exactly “/blog/articles” (this is case-sensitive on many servers)
Pro tip: When creating complex patterns, build them incrementally and test each step. It’s easier to debug a simple pattern than a complex one.
How to Check Your Redirects Are Working
You’ve done the hard work, so let’s now find out how to make sure you’ve set it all up correctly.
Below are a few ways to check your redirects. The best one depends on the nature of your redirects and how many you’ve set up.
Manual Testing
The simplest way to test your redirects is to manually check them in your browser.
Just enter the old URL you’ve redirected and watch the address bar to see if it changes to the new URL.
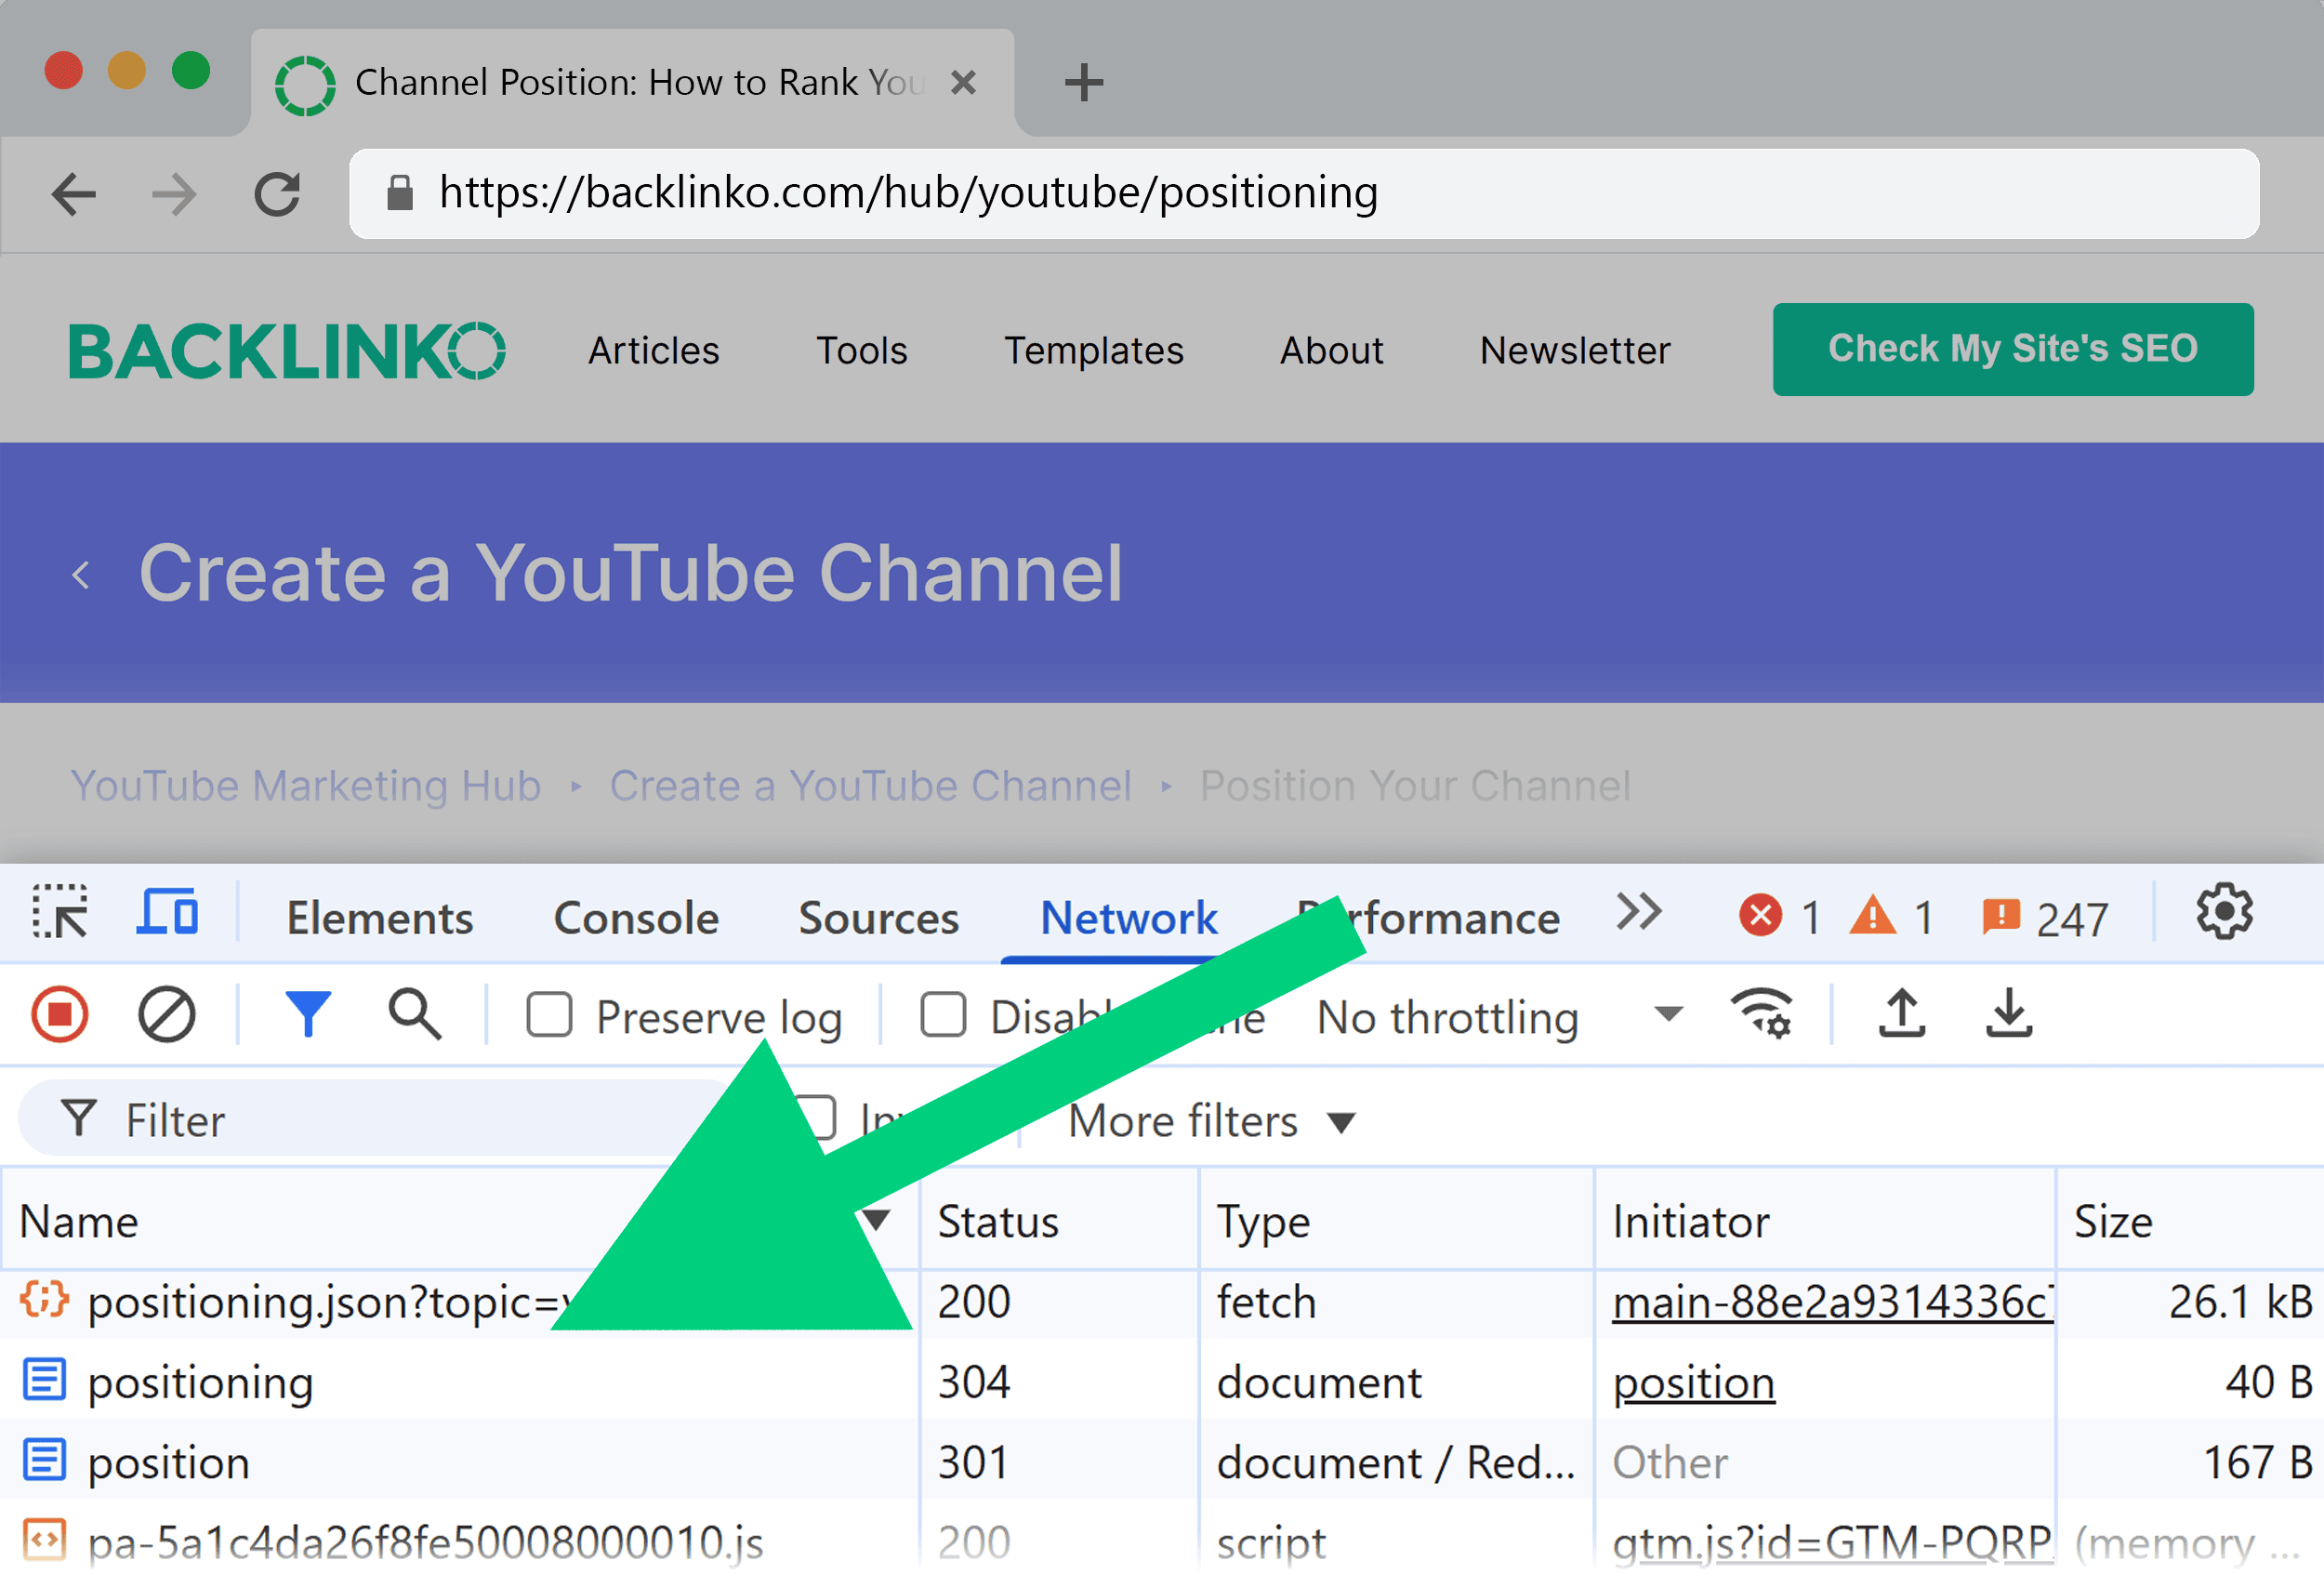
For a more detailed view of what’s happening, use your browser’s developer tools:
- Open developer tools (F12 in most browsers, or right click then “Inspect”) on the redirected page
- Go to the “Network” tab
- Reload the page and look for the redirect chain and status codes
In the example below, you can see it has redirected from the URL /position to /positioning:
Online Redirect Checkers
Several free tools can test your redirects and provide more technical details. One example is HTTP Status Code Checker.
These tools show you the entire redirect path, status codes, and how long each redirect takes to process:

Testing Multiple URLs
If you’ve set up many redirects (like a subfolder or domain-wide redirect), testing every URL manually isn’t practical.
The HTTP Status Code Checker tool does let you test multiple URLs…
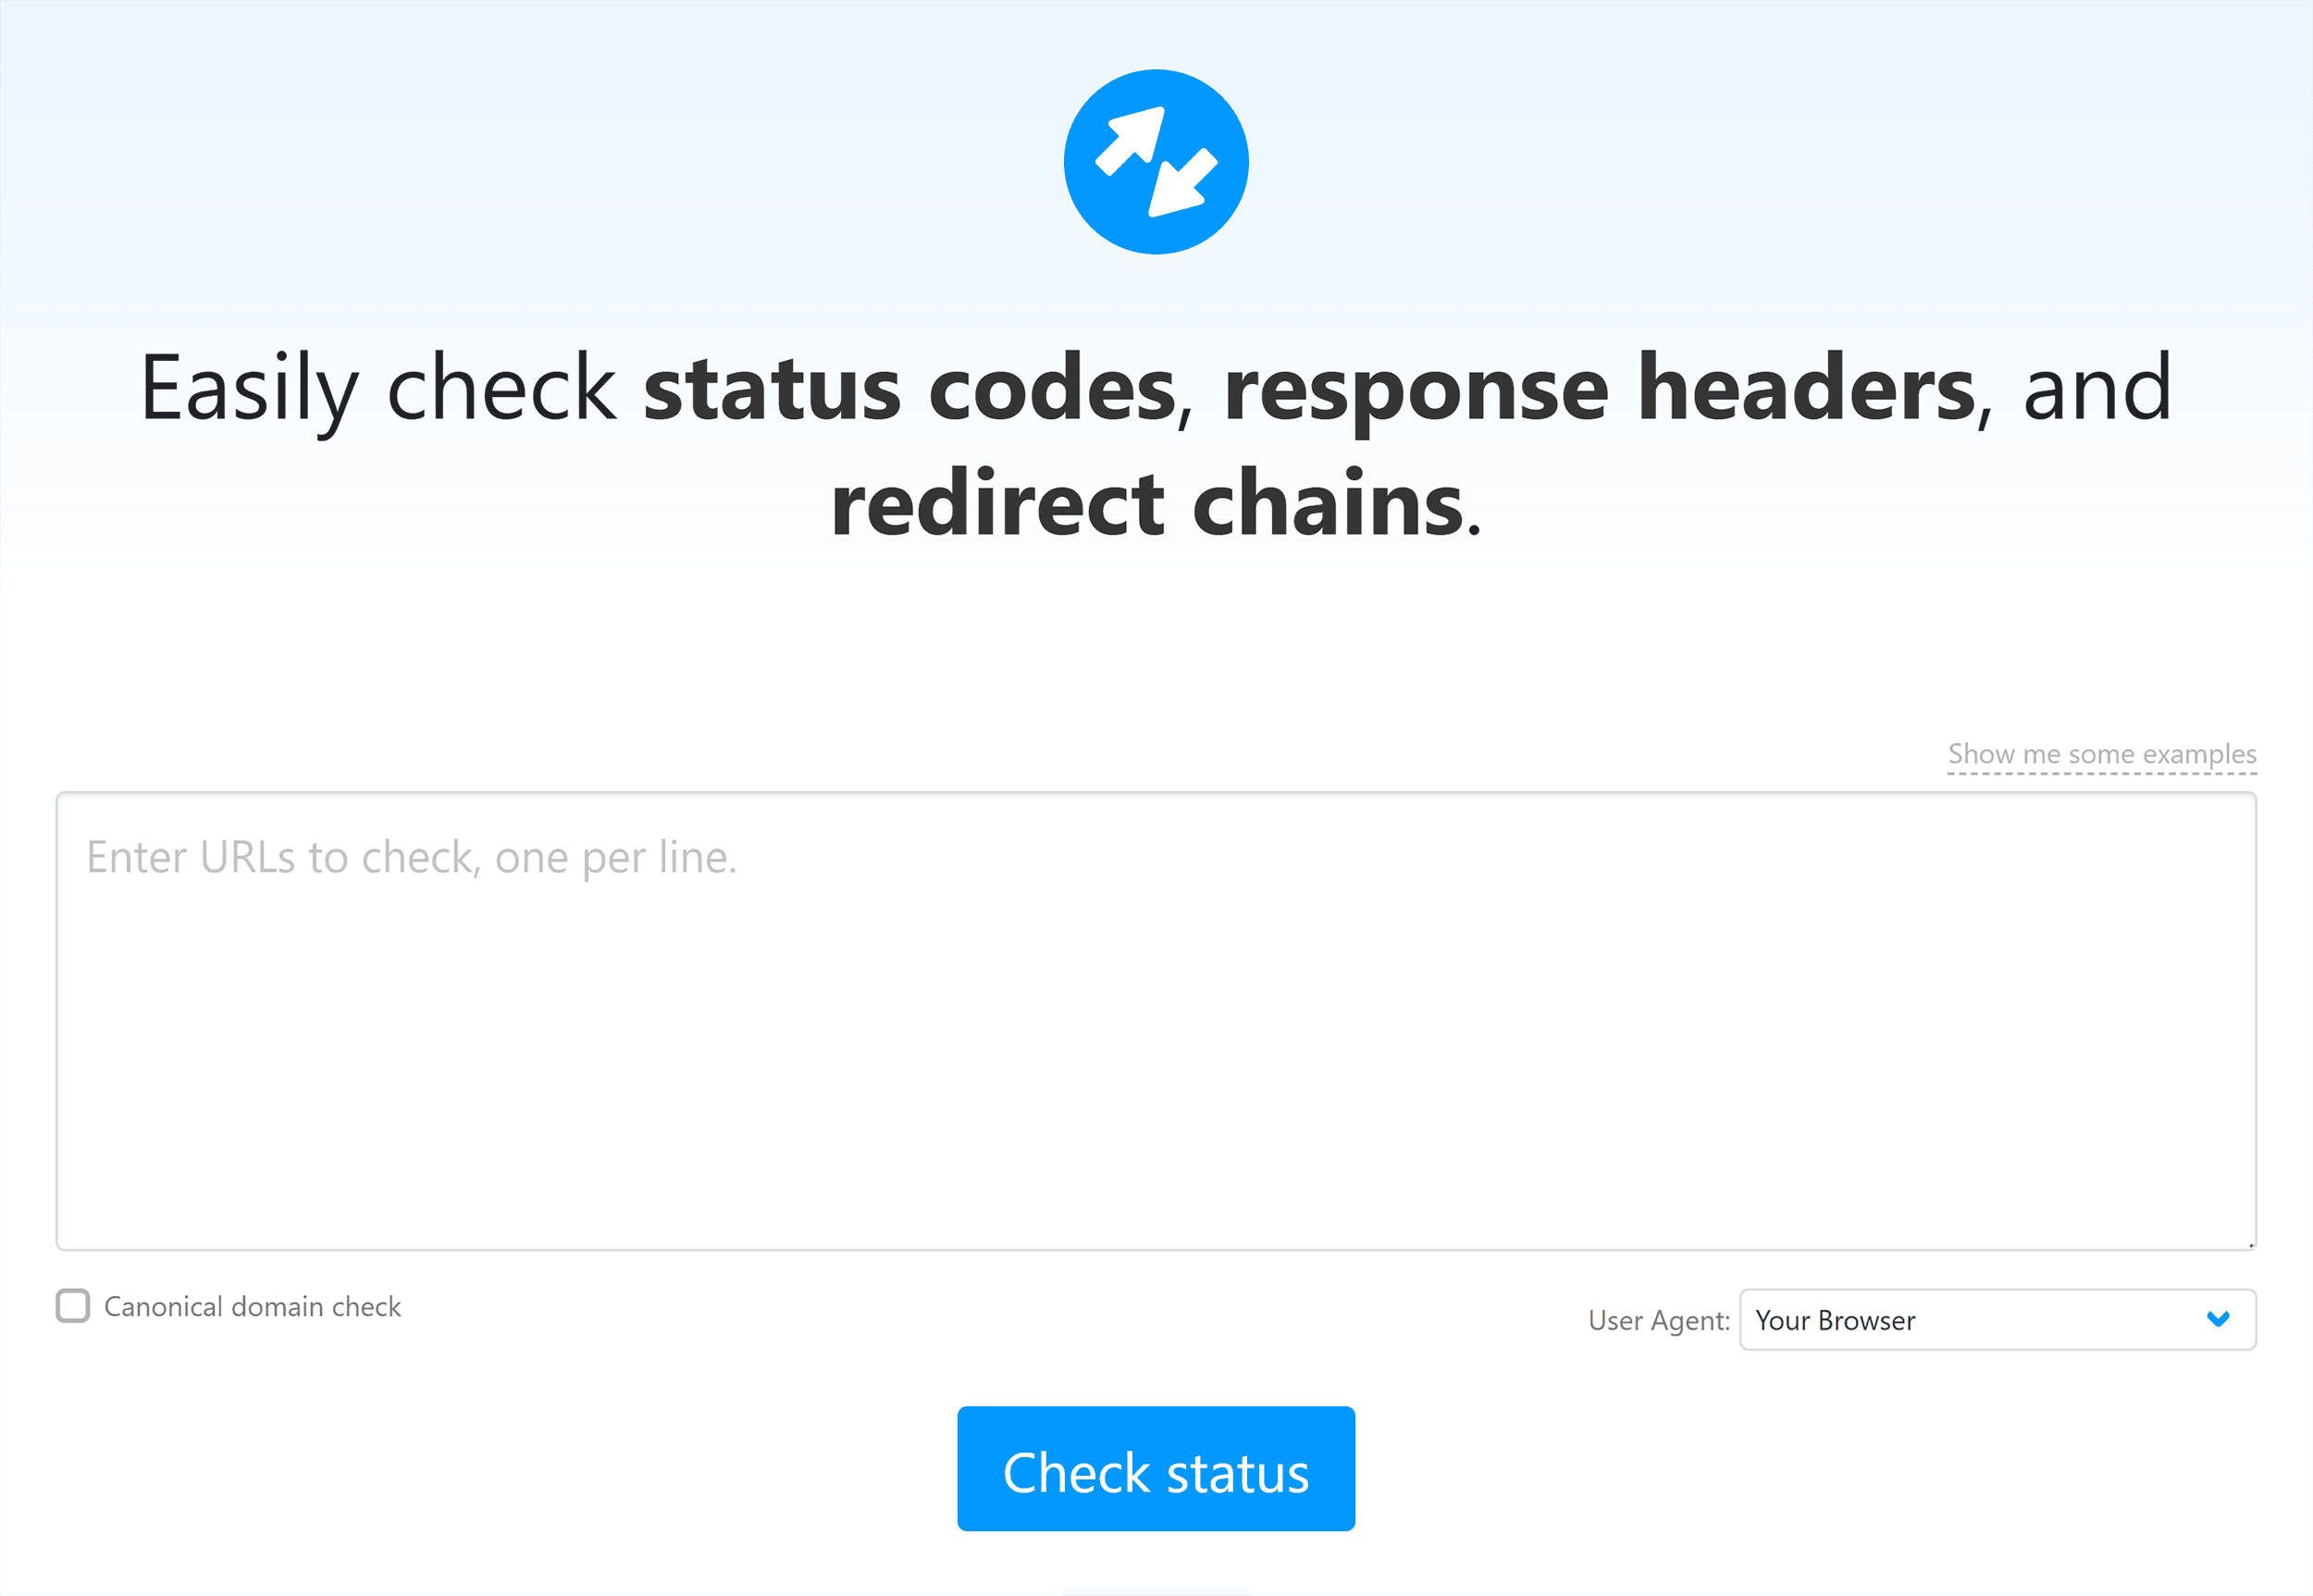
But this won’t be suitable for entire site redirects or when you have hundreds (or thousands) of redirects set up.
You could use a crawling tool and compare the crawl results to your sitemap, but that’s still going to be quite tedious.
Instead, consider using a tool like Semrush’s Site Audit.
Just pop your domain in, let the audit run, and then go to the “Issues” tab. Type in “redirect” to flag relevant issues.
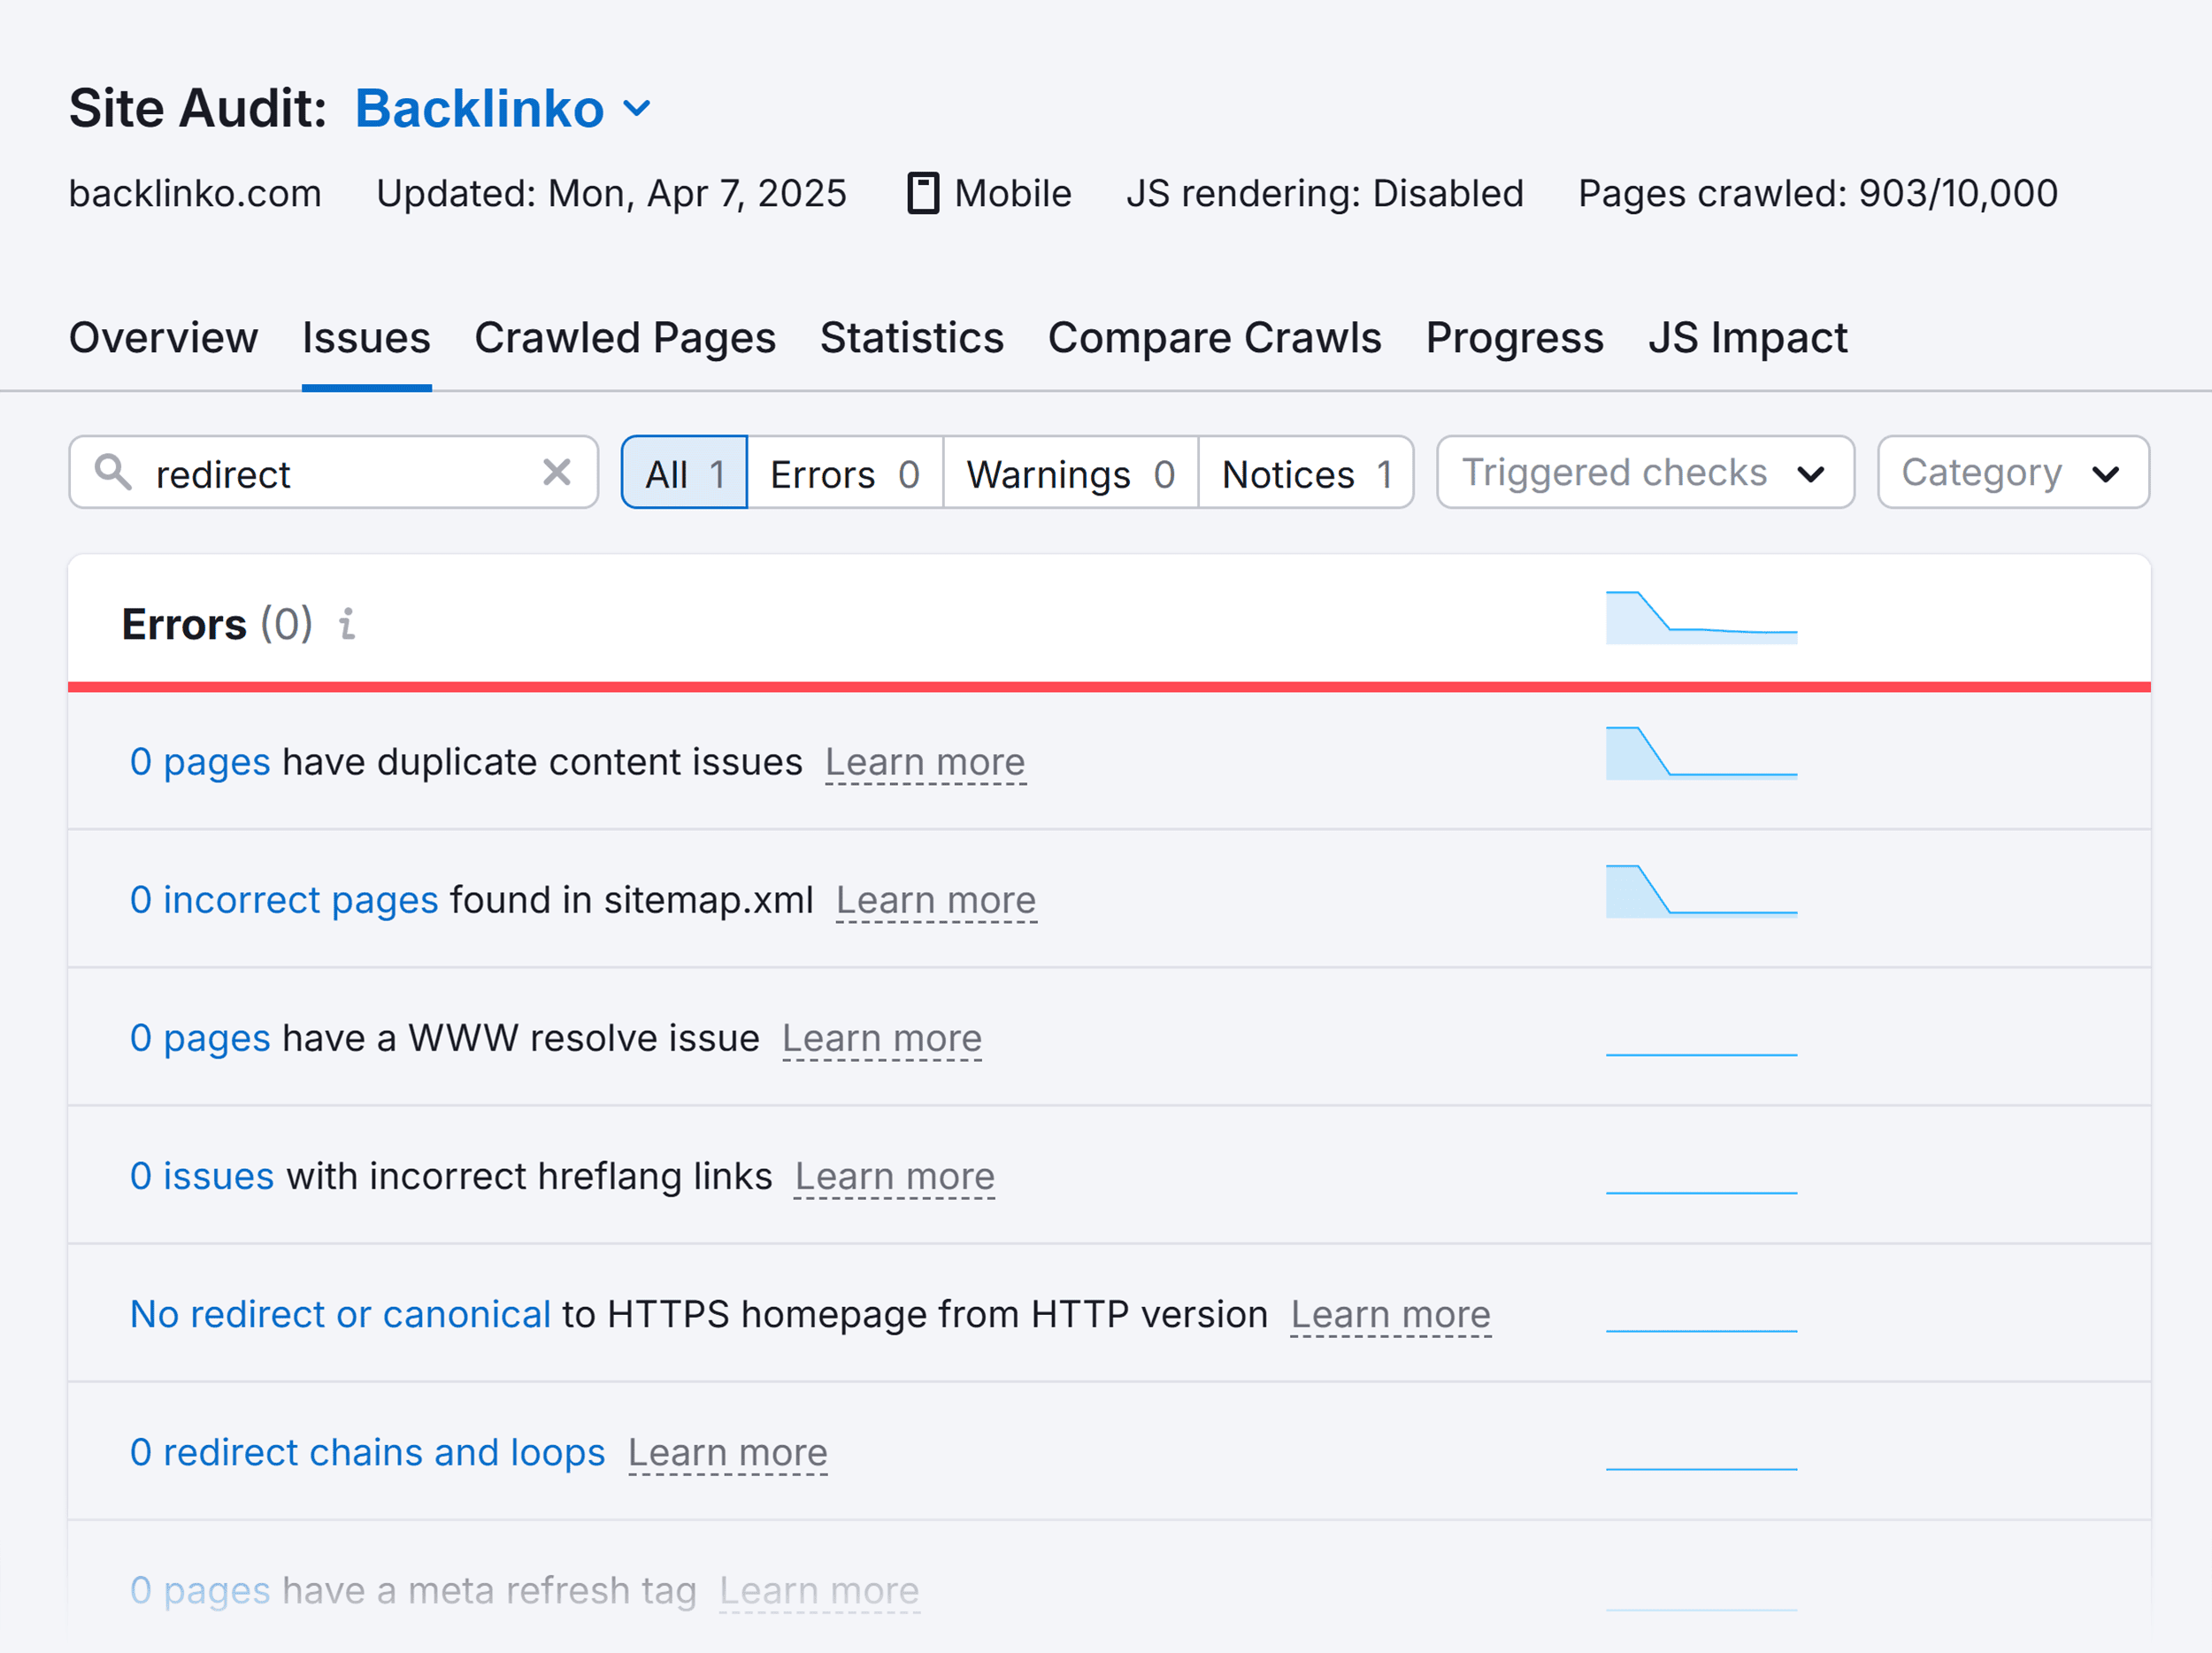
In particular, look out for:
- # incorrect pages found in sitemap.xml: This will highlight any of your pages in your sitemap that are redirecting elsewhere
- # pages have a WWW resolve issue: This will highlight issues if you haven’t specified which version (www or non-www) you prefer (e.g., via .htaccess redirects)
- No redirect or canonical to HTTPS homepage from HTTP version: This checks if your homepage is set up to serve the secure HTTPS version
- # redirect chains and loops: These create a bad user experience and can impact your SEO
- # URLs with a temporary redirect: Double check these redirects are indeed meant to be temporary
- # URLs with a permanent redirect: Check these URLs are supposed to redirect, and make sure they redirect to the correct place
Note: You can audit your site for free for up to 100 URLs. But for crawling more than that, try a Pro plan for free for 14 days with this link.
The post How to Create .htaccess Redirects (Most Common Use Cases) appeared first on Backlinko.


