Video is a useful and powerful tool to use for your marketing communication. A video can help potential customers understand more about your business and what you’re offering. However, shooting a video is easier said than done. If you’re a small business with a small budget, you might have questions like: where do I start? Which equipment should I acquire? And how should I promote my products or services using video?
Don’t worry! In this post, I’m going to talk you through the basic steps. By following these steps, you’ll be able to create your first promotional video in no time. I guarantee it will be an awesome addition to your product page and social media platforms.
Step 1: writing a script
People think the key ingredient for a successful video is the production quality and using impressive, glossy shots. Spoiler: it’s not. The most important element of almost any video is having a good script. Visitors can tolerate substandard imagery, as long as the audio is clear and the message resonates with them. Equally, the most beautifully shot, high-end piece in the world won’t do much if the script doesn’t make sense.

In addition, having a well-written script will help your confidence when it comes to shooting the video. You’ll know what to say and do, which increases the chance of a good performance.
The three core ingredients of a great script
In a basic promotional video, you need to cover a few things: the customer problem, your credentials to solve that problem, and the value proposition for your product or service. In abstract terms, these are Pathos, Ethos and Logos (not to be confused with the Three Musketeers: Aramis, Athos and Porthos).
- Pathos is the emotional resonance. You want to connect your business to the feelings of your prospective customer. This could be their pain points or the reason why they might be seeking out your product in the first place.
- Ethos is the credibility and authority your business has. This might be your experience, your vision, or your past success. Whatever it is, it should convince your customers to trust you with their time and money.
- Logos is the hard facts: what your product or service actually is and does. You should phrase this as a value proposition that ties function to customer need.
Examples
For example, you might have a B2B company that sells a plugin for international payments. Your essential message might boil down to: “You’re leaving money on the table because you’re not servicing international customers (pathos). We built a product that allows you to take payments from anyone, from anywhere in the world (logos). We have 3000 happy customers and offer the lowest transaction fees on the market (ethos).”
Let’s look at a B2C example. Imagine your company sells jeans: “It’s hard to find great jeans that fit (pathos). We’ve worked with thousands of people across the world (ethos), to develop tailored cuts that perfectly fit any figure (logos).”
Write it down
Try to map out these elements for your business. See if you can get it as succinct as possible – ideally into just a few sentences. This is the core of your script, which you can expand with more information about your product or service. You could even demonstrate your product, if appropriate.
Short video, short script
A good and simple promotional video is usually around 1-2 minutes. In terms of a script, this means somewhere between 100 and 200 words. It’s difficult to condense everything you want to say into such a small amount of copy, but it’s worth it. Short videos perform really well. In addition, there’s a lower chance your customers will lose interest. Good luck!
Step 2: shooting your A-roll
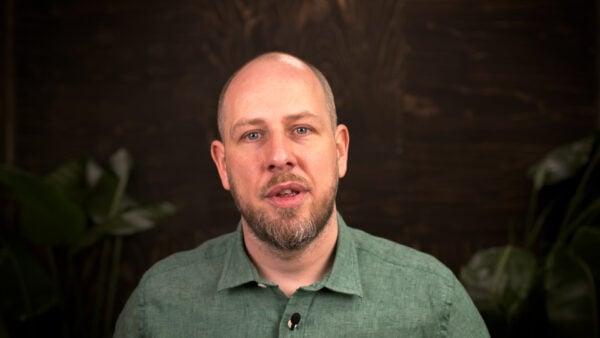
A-roll is the term used to describe the primary shot of any video. In most cases, this is a simple ‘talking head’. Talking heads tend to be a much better approach for your first video than animations. Why? Because it adds credibility when people can actually see the faces behind a business.
So, pick a person who will read the script, then prepare to shoot your video.
Find a nice place to shoot
Ideally, you want a quiet room with good natural light. A plain white wall could work, but adding plants or interesting furniture will make your video more visually interesting. If you do want to shoot in front of a white wall, make sure you don’t see the shadow of the person standing in front of it.

Decide whether you’d rather sit or stand for your video. If you’re seated, find a stool or a chair that will force you to sit up straight. It will look better on camera.
Find natural light
Always film in a room with lots of light! Have your speaker face a window, while the camera has the window at its back. This produces the best natural light. Filming the other way around simply doesn’t work, because your speaker will be shrouded in darkness. It will look mysterious, but it’s ultimately not the vibe you’re going for.
Smartphone cameras are better than you think
These days, smartphone cameras are more than sufficient for shooting a good ‘talking head’ video. However, if you have a DSLR or a high-end camera that you know how to operate, that’s even better.
Line up your shot at a nice “medium” height. Meaning: head and torso are clearly visible, and your speaker is close enough that facial expressions are easy to read.

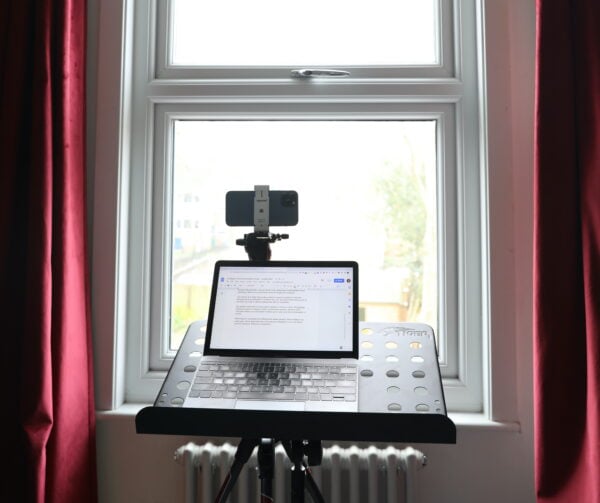
Tip: if you’re using a phone or external camera, place your laptop behind or just below your camera. You can display your script on the screen and use it as a teleprompter!
Use a good video recording app
If you’re shooting on a smartphone, it’s worth downloading a specific video recording app. They can give you more control over the exposure (the brightness of your shot) and focus (what is in focus and what isn’t). The default camera app does have tools to adjust these settings, but they might not be as extensive as other apps.
Phone:
- FiLMic Pro
- ProMovie
If you’re shooting with your laptop, there are a ton of good free recording apps out there to help you.
Desktop:
- QuickTime (Mac)
- Windows Camera (Windows)
- OBS
- Soapbox
- mmhmm
If you are using another camera, YouTube is your friend. There are tons of great tutorials online.
Shoot as many takes as you want
Rather than worry about trying to get everything perfect in one go, take your time to get it right. Shoot as many takes as you want until you’re satisfied. However, it might still be useful to learn your text by heart before you start recording. You could also use a laptop to display your script. Simply place it behind or below the camera.
Don’t forget to look into the camera when you’re speaking. And try to be animated and engaged! Lots of big smiles and positive energy will make a better impression on your audience.
Step 3: shooting your B-roll
B-roll are the additional shots that spice up your video. They add some visual and creative interest.
What sort of B-roll you have to shoot, depends a lot on the particular product or service you offer. If you sell a physical product, you may want to get some close-up shots of the product itself. If you sell a software product, screenshots of the dashboard for example are more appropriate. And, if you sell a service, you may want to get some general shots of yourself or your team at work. This will give potential customers an idea of the attitude and style of your business.
Product close-ups
Display your product in a neutral, well-lit space. Make sure you get lots of different angles and types of shots. Always film more options than you think you need. Use a tripod if you have one. This will keep your footage as stable as possible.

General office shots
Similarly, for general views of an office or factory, spend some time getting as many different options as you can with whatever camera you have. Some slow panning shots, ideally using a tripod, will add some movement and visual interest, while a few close-ups of people working can add interest as well.
Screencasts
If you’re promoting a software product, you’re going to want to show off its functionality and UI. In order to do this, you’ll need a good screen capture tool. Thankfully, there are tons of easy to use desktop and cloud apps available. Try out a few! Find the one that’s most intuitive to you.
- Camtastia
- Screenflow
- Soapbox
- QuickTime
Bear in mind: you’ll probably have to zoom in a lot on your interface to make it visible for viewers. Why? Because your video will typically be watched within a smaller 640px wide frame, rather than full-screen. Try to show one thing clearly with each shot, and demonstrate the product in action.
Step 4: piece everything together
In this step, you’ll get to work some magic. You’re going to combine and edit the footage you just shot, and create a beautiful video. There are many great video editing apps available that allow for a simple, quick edit.
Desktop apps:
- iMovie (Mac)
- Premiere Rush (Both Mac and Windows)
Cloud apps:
- ClipChamp
- WeVideo
- Wave.video
Smartphone apps:
- LumaFusion
- Premiere Rush
- InShot
- PowerDirector
How to start editing
Go through your footage and find the best takes from your ‘talking head’ A-roll recording. String these together to create your audio track and the main camera angle.
Next, include some of your B-roll on top of the other footage to add visual interest. You could also use B-roll shots to hide any awkward jump cuts. They will ensure that your video flows smoothly, while showing off your product or service at the same time.
Once you have a basic cut that you’re happy with, you could elevate things even further by adding visual effects.
Step 5: include additional animated elements
There are a whole bunch of great tools available that allow you to add simple overlays and animations to your videos, such as logo sequences, lower thirds, and call-outs. Simply upload your rough cut to one of these online video editing tools. Then add whatever animated elements best help tell your story.
Cloud animation apps:
- Kapwing
- Wave.video
- Promo
- Powtoon
Step 6: add music
Almost there! The last step is adding music, because music can strengthen your message even more. It creates a good mood, which in turn could make your visitors happier! You can include music with most of the online video editing tools mentioned in this post. But you could also buy good stock options from sites like Pond5. Keep the volume of the music fairly low, though. You don’t want it to overpower your voice or become too distracting.
Once the audio is in place, you’re good to go! Upload your video to your website, YouTube, and wherever else is appropriate for your business. Just make sure you implement video SEO to get your video ranking! The Yoast Video SEO plugin can help you drive traffic to videos on your website:
Get your videos in the search results!
Get the Yoast Video SEO plugin and drive more traffic to your website:
The post How to make a video to promote your business appeared first on Yoast.


