


Managing user permissions in Squarespace is a key administrative task that you may need to do frequently as a Squarespace website designer or owner.
Whether adding new contributors, setting their permissions, or transferring ownership, all these tasks can be done swiftly from the Squarespace platform. This blog post will guide you through the step-by-step process of effectively managing user permissions on your Squarespace site.
Step 1: Log into Squarespace and Access the Settings
Start by logging into your Squarespace account. Once you’re in, you’ll be greeted by the main dashboard. From here, look for the left-hand side menu. Click on ‘Settings’ – this is where managing user permissions begins.
Step 2: Navigate to Permissions
After you’ve accessed the settings, the next step is to click on ‘Permissions’. This will take you to the page to view all your website’s admins and contributors.
Step 3: Understand Your Profile Details
Here on this page, you’ll notice your own details appearing on the right-hand side. As the owner of the website, you have full authority to manage users and their permissions. It’s also noteworthy that you can transfer ownership to another admin if you’ve added one to your site.
Step 4: Get Familiar with User Roles
In Squarespace, you have several user roles to assign. You can invite new contributors and assign them as full administrators, website editors, store managers, or basic authors. While a full administrator has comprehensive permissions, a basic author has limited ones, allowing them only to edit content on existing pages without the ability to add new ones or change the structure of the website.
Step 5: Review the List of Admins and Contributors
Scroll down the same page to see the list of admins and contributors. Admins hold superior permissions compared to contributors.
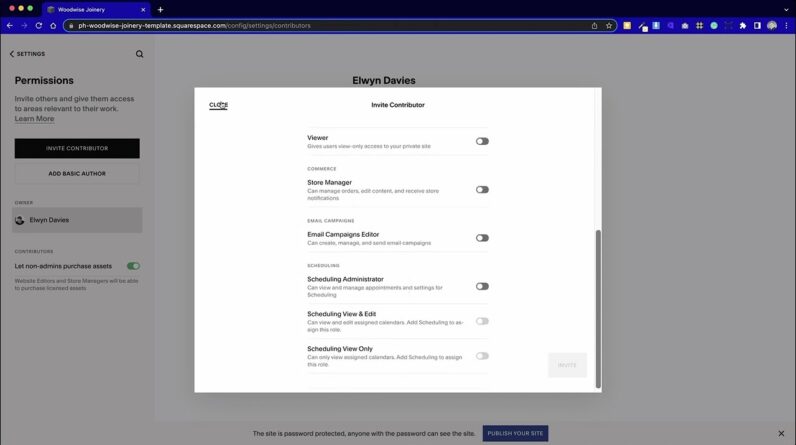
Step 6: Invite a New Contributor
If you wish to invite a new contributor, all you need to do is enter their name, email address, and set their permissions. After you’ve entered these details, Squarespace will automatically send an invitation email to the specified user. This email will contain a link allowing the user to log in or create a new account.
By following these six easy steps, you can easily manage user permissions in Squarespace, making your website management experience smooth and stress-free.
GET A 20% DISCOUNT ON YOUR FIRST ANNUAL/MONTHLY SQUARESPACE PLAN!
Follow the steps below:
1. Create a free trial in Squarespace by following the link below: https://squarespace.syuh.net/pixelhaze
2. When subscribing to your first plan, use our voucher code to get a 20% discount on your first month/year plan: PixelHaze20